Author: Mason

  • The Cozy Charm of Taco Soup: A Comforting One-Pot Wonder

    The Cozy Charm of Taco Soup: A Comforting One-Pot Wonder

    I’ve always loved how taco soup feels like a warm, chaotic hug — especially on busy nights when you want something filling but don’t want to fuss. It’s one of those recipes that’s forgiving, adaptable, and perfect for improvising with whatever’s lurking in your fridge. Plus, it smells like home—spicy, savory, a little smoky.

    Why I Keep Coming Back to This Recipe

    It’s honest, versatile, and feels like a warm blanket on a chilly day. The process is forgiving, making it perfect for busy nights or lazy weekends. Plus, it’s endlessly customizable—every bowl can be a new story, a new twist.

    Breaking Down the Taco Soup Staples

    • Ground beef: I like it browned well for flavor, but turkey works too if you want leaner.: Gives richness and heartiness, but swap for lentils for a vegetarian version.
    • Canned diced tomatoes: Juicy and tangy, they form the flavor base. Use fire-roasted for smoky depth.: Adds brightness and acidity, can be replaced with fresh chopped tomatoes in summer.
    • Beans (black or kidney): Creamy, filling, and a good protein boost. Rinse well to remove excess salt.: The creamy texture is satisfying, but chickpeas are a good swap if you prefer milder flavor.
    • Corn: Adds sweetness and a pop of texture. Frozen or fresh works best.: Juicy and crisp, or charred slightly for smoky notes.
    • Spices: Chili powder, cumin, paprika—your flavor crew. Adjust to taste.: Layer the spices for depth; start small and build.

    Tools of the Trade for Taco Soup

    • Large heavy-bottomed pot: For even heat and easy stirring.
    • Wooden spoon: To mix ingredients and prevent sticking.
    • Measuring cups and spoons: For precise seasoning.
    • Knife and cutting board: Chopping vegetables and meat.
    • Ladle: Serving the hot soup.

    Step-by-Step for a Hearty Taco Soup

    Step 1: Gather all your ingredients and prep your workspace.

    Step 2: In a large pot, cook the ground beef over medium heat until browned, about 8 minutes.

    Step 3: Add chopped onions and garlic; cook until fragrant, about 2 minutes.

    Step 4: Stir in diced tomatoes, beans, corn, and spices. Let simmer for 20 minutes, uncovered.

    Step 5: Taste and adjust seasoning—more chili powder or salt if needed.

    Step 6: Ladle into bowls, top with shredded cheese, sour cream, and fresh cilantro.

    Step 7: Serve hot, with crusty bread or tortilla chips on the side.

    Cooking Checkpoints & Tips to Nail It

    • Cook the beef thoroughly until no pink remains, ensuring a rich flavor.
    • Let the soup simmer gently to develop depth—avoid boiling vigorously.
    • Taste and adjust seasoning before serving for perfect balance.
    • Watch the beans and corn—add later if using fresh to prevent overcooking.

    Common Mistakes & How to Fix Them

    • Soup is too thick or sticky.? Add a splash of broth or water to loosen a too-thick soup.
    • Flavor feels flat or watery.? Reduce heat and simmer longer to deepen flavors.
    • Burnt flavor or stuck bits.? Stir more frequently to prevent burning at the bottom.
    • Missing depth of spice or salt.? Taste and season again before serving.

    Hearty Taco Soup

    This taco soup is a comforting, hearty dish made with ground beef, canned diced tomatoes, beans, corn, and a blend of chili spices. It simmers until flavorful and thickened, resulting in a warm, chunky soup with a spicy, savory aroma and a satisfying texture. Perfect for busy nights or casual gatherings, it’s easily customizable with your favorite toppings.
    Prep Time 10 minutes
    Cook Time 30 minutes
    Total Time 40 minutes
    Servings: 6
    Course: Main Course
    Cuisine: American
    Calories: 320

    Ingredients
      

    • 1 pound ground beef or turkey for leaner option
    • 1 medium onion chopped
    • 2 cloves garlic minced
    • 1 can (14.5 oz) diced tomatoes fire-roasted optional
    • 1 can (15 oz) black beans rinsed and drained
    • 1 cup corn frozen or fresh
    • 2 tablespoons chili powder adjust to taste
    • 1 teaspoon cumin
    • 1 teaspoon paprika
    • to taste Salt and pepper

    Equipment

    • Large heavy-bottomed pot
    • Wooden spoon
    • Measuring cups and spoons
    • Knife
    • Cutting board
    • Ladle

    Method
     

    1. Heat the large heavy-bottomed pot over medium heat. Add the ground beef and cook, breaking it apart with a wooden spoon, until browned and cooked through, about 8 minutes, until you see a rich, caramelized color.
    2. Add chopped onion and minced garlic to the pot. Cook, stirring frequently, until fragrant and the onion turns translucent, about 2 minutes. You’ll notice a savory aroma filling the air.
    3. Stir in the canned diced tomatoes along with their juices, and add the rinsed black beans and corn. Mix well to combine all the ingredients evenly. The mixture should look colorful and slightly thickened.
    4. Sprinkle in chili powder, cumin, and paprika. Stir to evenly coat the ingredients with the spices. Let the mixture simmer gently, uncovered, for about 20 minutes. During this time, the flavors meld and the soup thickens slightly, developing a deeper aroma.
    5. Taste the soup and adjust the seasoning with salt, pepper, or more chili powder if you like it spicier. Stir well to incorporate the adjustments.
    6. Use a ladle to serve the hot soup into bowls. Top each serving with your favorite garnishes like shredded cheese, sour cream, or chopped cilantro for added flavor and texture.

    Notes

    This soup is versatile—feel free to add chopped bell peppers, jalapeños, or swap ground turkey for a leaner option. It keeps well in the fridge and tastes even better the next day.
    This soup’s simplicity is its charm—easy to make, yet deeply satisfying. You can tweak the ingredients to match what’s in your pantry or your mood. The best part? It gets better the next day, flavors melding into a warm hug in a bowl. Don’t be shy to add a dash of hot sauce or a squeeze of lime for that extra zing.

  • Chicken Noodle Soup Recipe: A Cozy Revival with a Twist

    Chicken Noodle Soup Recipe: A Cozy Revival with a Twist

    Chicken noodle soup feels like slipping into your favorite sweater—familiar, warm, and unexpectedly restorative. But sometimes, I find the magic is in the small tweaks—like adding a dash of fish sauce or a squeeze of lemon—to brighten the broth and lift the whole bowl.

    Why I Keep Coming Back to This Soup

    It’s a bowl that welcomes you home, especially in chilly weather. The familiar flavors evoke childhood afternoons, but the tweaks keep it interesting. It’s quick to make, endlessly adaptable, and always satisfying—like a hug from the inside.

    Ingredients & Their Secrets

    • Carrots: Sweet, earthy crunch that brightens the broth, especially good when softly simmered.
    • Celery: Adds a fresh, slightly bitter note, balancing the richness of chicken.
    • Onion: Builds a base of sweetness and umami, essential for depth.
    • Chicken broth: The backbone—use homemade if you can, for richer flavor.
    • Noodles: Opt for egg noodles for a tender bite that soaks up the broth.
    • Fresh herbs: Parsley or thyme add a burst of green and aromatic lift.
    • Lemon or lemon juice: Brightens the whole dish with a citrusy pop, especially when added just before serving.

    Tools & Equipment for Soup Success

    • Large soup pot: To simmer all ingredients evenly and hold a generous amount of soup.
    • Chopping board and knife: For preparing vegetables and chicken with precision.
    • Ladle: To serve the soup without losing precious broth.
    • Strainer: To drain noodles efficiently and prevent overcooking.

    Step-by-Step to a Soul-Warming Bowl

    Step 1: Start by gathering your ingredients and tools. Peel and chop carrots, celery, and onion. Keep everything within arm’s reach for efficiency.

    Step 2: In a large pot, heat a splash of oil over medium heat (about 160°C/320°F). Add the chopped vegetables. Sauté until fragrant and slightly softened, about 5 minutes.

    Step 3: Pour in chicken broth, bring to a gentle simmer (around 90°C/194°F). Add shredded cooked chicken and season with salt, pepper, and a sprig of thyme. Let it simmer for 15 minutes.

    Step 4: While the soup simmers, cook your noodles separately in boiling water until al dente (about 8 minutes). Drain and set aside.

    Step 5: Add the cooked noodles to the soup. Taste and adjust seasoning. Let it simmer for another 2 minutes to meld flavors.

    Step 6: Serve hot, garnished with fresh parsley or a squeeze of lemon for brightness.

    Cooking Checkpoints & Tips to Perfect Your Soup

    • Vegetables should be fragrant and slightly translucent, not browned.
    • Noodles must be al dente — tender but with a slight bite.
    • Broth should be clear and aromatic, not cloudy or dull.
    • Soup should be steaming hot, with a vibrant, inviting aroma.

    Common Mistakes & How to Fix Them

    • Too much starch from overcooked noodles.? Add more broth or water if the soup is too thick and gloopy.
    • Vegetables burning or sticking to the pan.? Cook noodles separately to prevent them from absorbing too much broth.
    • Broth turning cloudy or greasy.? Lower heat if broth begins to boil vigorously, to keep flavors gentle.
    • Soup lacking depth or brightness.? Taste before serving and adjust salt or acidity as needed.

    Chicken Noodle Soup

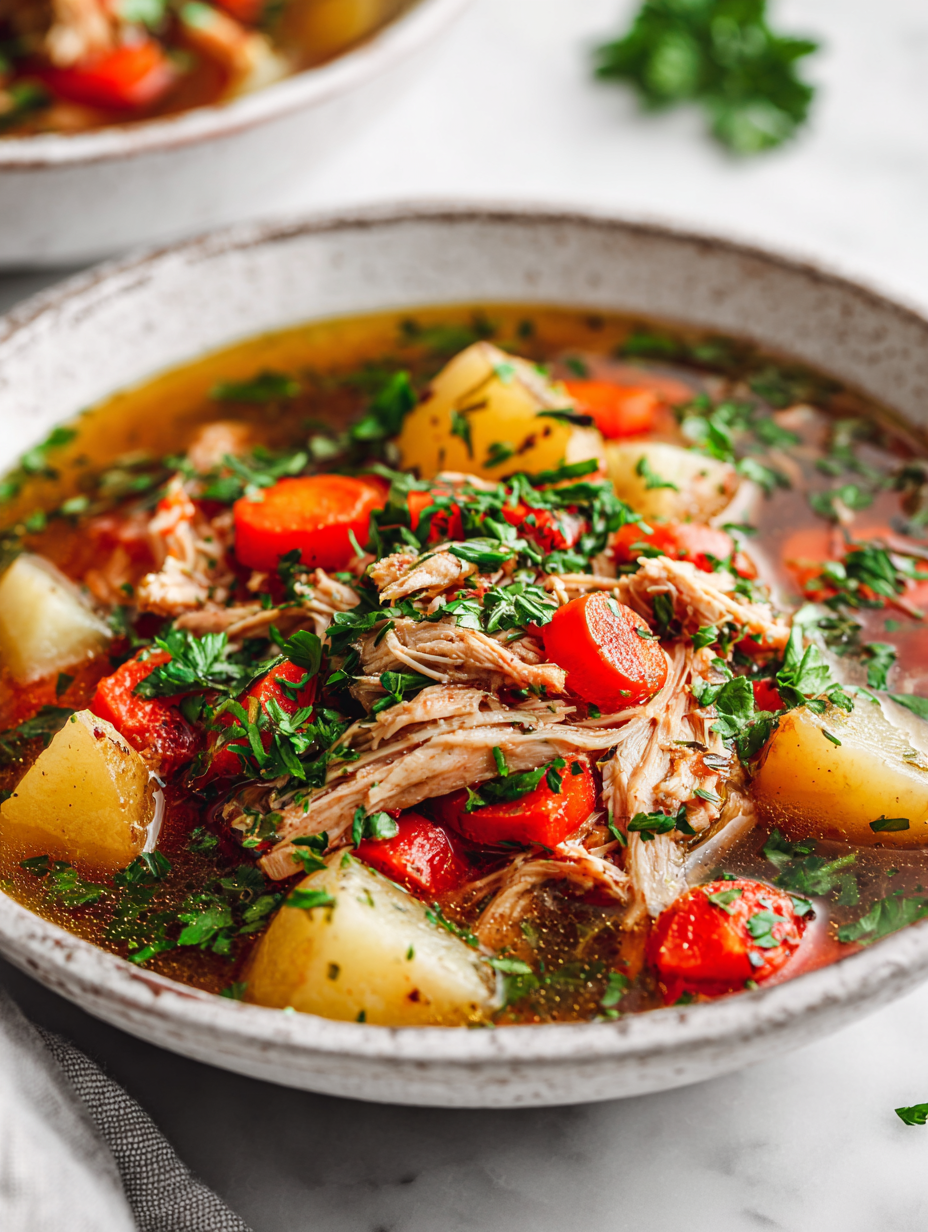
    This comforting chicken noodle soup combines tender vegetables, shredded chicken, and egg noodles simmered in a flavorful broth, finished with a bright squeeze of lemon. The soup is ladled into bowls with fresh herbs, offering a warm, inviting texture and aroma. Its simple, adaptable nature makes it a perfect quick meal for chilly days.
    Prep Time 10 minutes
    Cook Time 25 minutes
    Total Time 35 minutes
    Servings: 4
    Course: Main Course
    Cuisine: Comfort Food
    Calories: 350

    Ingredients
      

    • 2 cups carrots peeled and chopped
    • 2 stalks celery chopped
    • 1 medium onion diced
    • 4 cups chicken broth preferably homemade
    • 2 cups shredded cooked chicken rotisserie or boiled
    • 2 cups egg noodles cooked separately
    • 1/4 cup fresh herbs parsley or thyme, chopped
    • 1 tablespoon lemon juice freshly squeezed
    • 2 tablespoons oil for sautéing

    Equipment

    • Large soup pot
    • Chopping board and knife
    • Ladle
    • Strainer

    Method
     

    1. Heat a large soup pot over medium heat and add oil. Once shimmering, add the chopped carrots, celery, and onion. Sauté until fragrant and slightly softened, about 5 minutes, until the vegetables are translucent and fragrant.
    2. Pour in the chicken broth and bring the mixture to a gentle simmer. Add the shredded cooked chicken and a sprig of thyme or a pinch of chopped fresh herbs. Let it simmer uncovered for about 15 minutes, allowing flavors to meld and vegetables to soften further.
    3. While the soup simmers, cook your egg noodles in boiling water until al dente, following package instructions. Drain and set aside.
    4. Taste the broth and season with salt and pepper as needed. Remove the thyme sprig if used. Add the cooked noodles into the soup and stir gently to combine. Let simmer for another 2 minutes so the flavors meld.
    5. Finish by stirring in fresh lemon juice and chopped herbs, brightening the flavors and adding a burst of fresh aroma.
    6. Serve the hot soup in bowls, garnished with extra herbs if desired, and enjoy the comforting, vibrant flavors.
    This chicken noodle soup isn’t just comfort in a bowl; it’s a reminder of home, of simple ingredients coming together. Feel free to tweak the herbs or add a splash of soy for a different flavor profile. Just enjoy it—every spoonful is a little moment of calm amid chaos.

  • Unconventional Turkey Chili: A Cozy, Smoky Twist to Warm Your Soul

    Unconventional Turkey Chili: A Cozy, Smoky Twist to Warm Your Soul

    I’ve always loved the idea of turning leftovers into something unexpectedly warm and satisfying. Turkey chili has this charm—it’s a way to coax flavor out of what might seem ordinary, especially if you’ve got some cooked turkey in the fridge. But I like giving it a smoky, slightly charred edge, which makes it feel like a whole new dish. It’s comfort food with a bit of edge, perfect for staying cozy.

    Why I keep coming back to this smoky turkey chili

    It’s the perfect cozy dish for chilly evenings, offering smoky warmth and comforting spice. I love customizing it with different beans or extra heat. The slow simmer makes the flavors sing, and leftovers taste even better the next day. It’s a dish I keep returning to when I want something familiar yet unexpectedly vibrant.

    Breaking down the ingredients that craft the perfect smoky turkey chili

    • Ground turkey: Lean and mild, it absorbs flavors well. Use dark meat for extra juiciness or a mix for richness.
    • Smoked paprika: Adds a deep smoky aroma and a vibrant red hue, essential for that smoky punch.
    • Crushed tomatoes: Gives body and acidity. For a fresher taste, substitute with fire-roasted or sun-dried tomatoes.
    • Kidney beans: Creamy and hearty, they balance spice with their soft texture. Swap with black beans if you prefer a different bite.
    • Chili powder and cumin: Foundation spices that build depth. Feel free to tweak the heat level or add a pinch of cinnamon for complexity.
    • Lime and cilantro: Bright, fresh accents that lift the dish. Use lemon if you prefer, but lime’s zing is unmatched.

    Tools of the trade for a smoky turkey chili

    • Large heavy-bottomed pot: Ensures even heat distribution and prevents scorching.
    • Wooden spoon: For stirring without scratching the pot.
    • Chopping board and knife: Prepping onions, garlic, and spices efficiently.
    • Can opener: Opening canned tomatoes and beans.
    • Ladle or spoon: Serving the chili neatly.

    Step-by-step guide to a smoky, hearty turkey chili

    Step 1: Heat a large heavy-bottomed pot over medium heat, about 180°C (356°F).

    Step 2: Add a splash of oil and sauté chopped onions and garlic until fragrant, about 5 minutes. They should be translucent and slightly caramelized.

    Step 3: Crumble in the ground turkey, stirring and breaking it apart. Cook until it turns golden brown, roughly 8 minutes.

    Step 4: Stir in smoked paprika, cumin, chili powder, and a pinch of cayenne. Let the spices toast for a minute until fragrant.

    Step 5: Pour in crushed tomatoes, kidney beans, and a splash of chicken broth. Bring to a simmer, then reduce heat to low, about 85°C (185°F).

    Step 6: Simmer uncovered for 30-40 minutes, stirring occasionally, until the chili thickens and the flavors meld. Check for seasoning, adjust salt and pepper.

    Step 7: Serve hot, garnished with chopped cilantro and a squeeze of lime. Let it rest for a few minutes before digging in.

    Cooking checkpoints to keep your chili perfect

    • The onions should be golden and fragrant before adding the turkey.
    • Spices should toast lightly, releasing aroma and deepening flavor.
    • The chili should simmer gently, not boil vigorously, to develop richness.
    • The final chili should be thick enough to hold on a spoon but not dry.

    Common mistakes and how to fix them

    • Chili too thin after simmering.? If chili is too watery, simmer longer to reduce and concentrate flavors.
    • Chili is bland.? Add a teaspoon of cornstarch mixed with water if it won’t thicken.
    • Spices overpower the dish.? Adjust seasoning with more salt, or a splash of vinegar to brighten flavors.
    • Spices are burning and smelling acrid.? Reduce heat to prevent sticking or burning.

    Smoky Turkey Chili

    This smoky turkey chili is a hearty, comforting dish made by simmering ground turkey with aromatic spices, crushed tomatoes, and beans until thick and flavorful. The addition of smoked paprika gives it a deep, smoky aroma, while the slow simmer develops rich, vibrant flavors and a thick, stew-like texture. Topped with fresh cilantro and a squeeze of lime, it’s perfect for cozy evenings.
    Prep Time 10 minutes
    Cook Time 40 minutes
    Total Time 50 minutes
    Servings: 4
    Course: Main Course
    Cuisine: American
    Calories: 350

    Ingredients
      

    • 1 tablespoon oil vegetable or olive oil
    • 1 large onion chopped
    • 3 cloves garlic minced
    • 1 pound ground turkey lean or mixed dark and white meat
    • 1 teaspoon smoked paprika for smoky aroma
    • 1 teaspoon cumin ground
    • 2 tablespoons chili powder
    • 1 can (14 oz) crushed tomatoes
    • 1 can (15 oz) kidney beans drained and rinsed
    • 1 cup chicken broth optional, for thinning
    • to taste salt and pepper
    • for serving cilantro chopped
    • 1 lime lime cut into wedges

    Equipment

    • Large heavy-bottomed pot
    • Wooden spoon
    • Chopping board and knife
    • Can opener
    • Ladle or spoon

    Method
     

    1. Heat a large heavy-bottomed pot over medium heat and add a tablespoon of oil. Once shimmering, add chopped onions and cook until translucent and fragrant, about 5 minutes.
    2. Add minced garlic and sauté for another minute until fragrant, making sure it doesn’t burn.
    3. Crumble in the ground turkey and cook, stirring frequently, until it turns golden brown and is cooked through, about 8 minutes.
    4. Stir in smoked paprika, cumin, chili powder, and a pinch of cayenne if using. Let the spices toast for about a minute until fragrant, enhancing their flavor.
    5. Pour in the crushed tomatoes and add a splash of chicken broth if you want a thinner chili. Stir everything together and bring to a gentle simmer.
    6. Add drained kidney beans and stir to combine. Reduce heat to low and let the chili simmer uncovered for 30-40 minutes, stirring occasionally, until it thickens and flavors meld.
    7. Taste the chili and adjust seasoning with salt and pepper as needed.
    8. Once the chili is thick and bubbling with rich aroma, remove from heat. Serve hot, garnished with chopped cilantro and a squeeze of fresh lime wedges for brightness.

    Notes

    For extra smoky flavor, add a few drops of liquid smoke or charred peppers. Leftovers taste even better the next day as flavors deepen.
    This turkey chili isn’t just about comfort; it’s about embracing the smoky, spicy depths of a dish that’s forgiving and adaptable. Feel free to add more heat or swap in your favorite beans. It’s a pot that invites improvisation, making every batch a little different, a little more yours. Enjoy the slow, simmered magic—perfect for chilly nights or a casual weekend feast.

  • Lasagna Soup Recipe: A Cozy Twist on a Classic Italian Comfort

    Lasagna Soup Recipe: A Cozy Twist on a Classic Italian Comfort

    I’ve always loved lasagna, but sometimes it feels like too much fuss—layering, baking, waiting. So I turned that idea into a soup, a way to get all those flavors in a bowl that’s quick to make and even quicker to eat. It’s a reminder that comfort doesn’t have to be complicated, especially when the weather turns chilly.

    Why I keep coming back to this soup

    It’s the kind of dish that feels like an instant hug on a busy night. The flavors are familiar but layered, and it’s forgiving enough to adapt with whatever’s in the fridge. I love how it transforms simple ingredients into something hearty and satisfying, especially when I crave comfort without the carbs of traditional lasagna.

    Breaking down the ingredients

    • Crushed tomatoes: Juicy, slightly tangy, the backbone of the broth, adding richness and depth.
    • Ground beef: Adds hearty flavor, but you can swap for ground turkey or plant-based crumbles for a lighter or vegetarian version.
    • Lasagna noodles: Sturdy and satisfying, they soak up flavor, but broken or smaller pieces cook faster.
    • Ricotta or mozzarella cheese: Creamy and gooey, makes each spoonful indulgent; opt for vegan cheese if desired.
    • Fresh basil and herbs: Bright, aromatic, they lift the dish, especially when added at the end for freshness.
    • Red pepper flakes: Spicy kick that balances the richness, adjust to taste or leave out for milder.
    • Beef broth: Rich and savory, but vegetable broth works well for a vegetarian tweak.

    Tools of the trade for a cozy simmer

    • Large heavy-bottomed pot: For simmering the soup evenly and preventing scorching.
    • Chef’s knife: Chopping vegetables and herbs precisely.
    • Cutting board: A stable surface for prep work.
    • Ladle: Serving the soup easily and without mess.
    • Colander: Draining cooked noodles efficiently.

    Step-by-step: How to make cozy lasagna soup

    Step 1: Gather all your ingredients and tools before starting to keep the process smooth.

    Step 2: In a large pot over medium heat, sauté chopped onions and garlic until fragrant, about 2-3 minutes.

    Step 3: Add ground beef, cook until browned, breaking it apart with a spoon, about 5-7 minutes.

    Step 4: Pour in crushed tomatoes, beef broth, and a splash of red wine if you like, bring to a simmer.

    Step 5: Stir in Italian herbs, salt, pepper, and a pinch of red pepper flakes, then simmer uncovered for 20 minutes.

    Step 6: In the meantime, cook lasagna noodles separately until just al dente, drain and set aside.

    Step 7: Once the soup simmers, add diced ricotta or mozzarella for creaminess, stir gently.

    Step 8: Ladle into bowls, top with shredded cheese and fresh basil, and serve hot.

    Cooking checkpoints and tips to keep it real

    • Soup should be bubbling gently, not boiling aggressively, to preserve delicate flavors.
    • Noodles should be just shy of al dente—they’ll finish cooking in the hot soup.
    • The sauce should be thick enough to coat the back of a spoon—if it’s too runny, simmer longer.
    • Taste the broth before serving; it should be well-seasoned and vibrant, not bland.

    Common pitfalls and how to dodge them

    • Soup thickening too much or burning.? Add extra broth if the soup gets too thick or sticks to the bottom.
    • Noodles turning mushy or breaking apart.? Stir the noodles into the soup carefully to avoid breaking them.
    • Greasy or cloudy soup.? Skim off excess oil or foam from the surface for a clearer broth.
    • Under-seasoned final dish.? Taste and adjust seasoning before serving to prevent blandness.

    Lasagna Soup

    This lasagna soup combines the flavors of traditional lasagna into a hearty, comforting bowl that’s quick to prepare. It features a savory broth enriched with crushed tomatoes, ground beef, and herbs, topped with gooey cheese and fresh basil for a satisfying finish. The dish has a thick, flavorful broth with broken pasta pieces and melted cheese, offering a cozy, inviting appearance.
    Prep Time 10 minutes
    Cook Time 30 minutes
    Total Time 40 minutes
    Servings: 4
    Course: Main Course
    Cuisine: Italian
    Calories: 350

    Ingredients
      

    • 1 medium onion chopped
    • 3 cloves garlic minced
    • 1 pound ground beef or turkey or plant-based crumbles
    • 28 oz crushed tomatoes canned
    • 4 cups beef broth or vegetable broth
    • 8 oz lasagna noodles broken into smaller pieces
    • 1 cup ricotta or mozzarella cheese diced or shredded
    • 1 bunch fresh basil chopped
    • 1/2 teaspoon red pepper flakes adjust to taste
    • to taste salt and pepper

    Equipment

    • Large heavy-bottomed pot
    • Chef’s knife
    • Cutting board
    • Ladle
    • Colander

    Method
     

    1. Begin by chopping the onion and mincing the garlic, setting them aside for later.
    2. Heat the large heavy-bottomed pot over medium heat and add a splash of oil. Sauté the chopped onion and garlic until fragrant and translucent, about 2-3 minutes.
    3. Add the ground beef to the pot, breaking it apart with a spoon. Cook until browned and cooked through, about 5-7 minutes, until the meat is no longer pink.
    4. Pour in the crushed tomatoes and beef broth, stirring to combine everything well.
    5. Bring the mixture to a gentle simmer and stir in red pepper flakes, salt, and pepper. Let it simmer uncovered for about 20 minutes, allowing flavors to meld and the broth to thicken slightly.
    6. While the soup simmers, cook the broken lasagna noodles in a separate pot until just al dente, then drain and set aside.
    7. Add the diced ricotta or shredded mozzarella cheese into the simmering soup, stirring gently to create a creamy, gooey texture.
    8. Stir in the cooked pasta pieces into the soup, allowing them to soak up the flavorful broth and soften further.
    9. Chop the fresh basil and sprinkle it into the soup just before serving, adding a bright, aromatic note.
    10. Ladle the hot soup into bowls, garnish with additional cheese or basil if desired, and enjoy while steaming and hearty.
    This soup is like a warm hug that somehow manages to be both simple and deeply satisfying. It’s perfect for busy weeknights when you want comfort without the fuss, and it’s endlessly adaptable. Feel free to toss in whatever greens or leftovers you have—this dish wears its heart on its sleeve, forgiving and easy to love.

  • White Chicken Chili Recipe: A Cozy, Unexpected Take for Chilly Days

    White Chicken Chili Recipe: A Cozy, Unexpected Take for Chilly Days

    This white chicken chili started as a way to make use of leftover chicken and a few pantry staples. It’s become a go-to when I need something hearty but not heavy, especially in the fall and winter. I love how the flavors develop slowly, filling the kitchen with a comforting aroma that calls everyone to the table.

    Why I keep coming back to this white chicken chili

    The comforting aroma, the balance of smoky and bright flavors, and how forgiving it is to improvisation make it a staple. It’s perfect for when I want a bowl of warmth that’s simple but satisfying. Plus, it’s a dish I can make ahead and reheat, and it tastes just as good.

    Breaking down the key ingredients

    • Chicken breast or thighs: Cooked and shredded, provides lean protein and a mild flavor that absorbs spices.
    • Cannellini beans: Creamy and soft, they add body and a subtle nutty flavor—skip if you prefer a bean-free chili.
    • Green chilies: They add a fresh, slightly spicy kick, brightening the dish with a lemony tang.
    • Onions and garlic: Base aromatics—sweet, pungent, and essential for depth.
    • Cumin, coriander, smoked paprika: The spice trio delivers warmth and smoky undertones, making each spoonful cozy.
    • Lime juice and cilantro: Finish with these bright, fresh notes that lift the entire dish.
    • Chicken broth: The savory foundation; use low-sodium for control over salt.

    Essential tools for this cozy chili

    • Large heavy-bottomed pot: Even heat distribution for simmering
    • Sharp knife: Chopping onions, garlic, and herbs
    • Wooden spoon: Stirring and scraping without scratching
    • Measuring spoons and cups: Accurate spice and broth measurements
    • Lime squeezer: Extracting bright juice for finishing

    Step-by-step guide to making cozy white chicken chili

    Step 1: Start by gathering all your ingredients. It’s a simple mix, but each one plays a crucial role.

    Step 2: Heat a large pot over medium heat, about 160°C (320°F). Add a splash of oil and let it shimmer.

    Step 3: Sauté diced onions and garlic until translucent and fragrant, about 5 minutes.

    Step 4: Add the shredded cooked chicken, a can of rinsed cannellini beans, and a can of diced green chilies.

    Step 5: Pour in chicken broth, add spices (cumin, coriander, a pinch of smoked paprika), and bring to a simmer.

    Step 6: Cook uncovered for about 20 minutes, stirring occasionally, until the flavors meld and the chili thickens slightly.

    Step 7: Finish with a squeeze of lime juice and a handful of chopped cilantro. Serve hot, with crusty bread or tortilla chips.

    Step 8: Let the chili rest for 5 minutes before serving. It thickens and the flavors deepen.

    Step 9: Test for doneness: chicken should be hot all the way through, chili should be velvety, and beans tender.

    Cooking checkpoints and tips to keep in mind

    • The onions should be soft, translucent, and sweet-smelling.
    • The chili needs to simmer gently, not boil vigorously, to develop flavor without overcooking the chicken.
    • Beans should be tender but not mushy—test by pressing with your spoon.
    • The final taste should be bright with lime and cilantro, balancing the smoky spices.

    Common mistakes and how to fix them

    • Chili too watery and thin.? ADD TOO MUCH LIQUID early on → Simmer uncovered longer to reduce.
    • Flat flavor after simmering.? FORGOT to taste and adjust spices → Add a pinch more cumin or lime to balance.
    • Lack of flavor complexity.? DUMPED in all ingredients at once → Sauté aromatics first for depth.
    • Over-soft ingredients, mushy texture.? Overcooked chicken or beans → Keep an eye on timing and test tenderness.

    White Chicken Chili

    This white chicken chili is a comforting yet light dish made with shredded cooked chicken, cannellini beans, and green chilies simmered in a flavorful broth with aromatic spices. The final dish has a velvety texture, brightened with lime juice and fresh cilantro, and offers a warm, hearty experience perfect for fall and winter evenings.
    Prep Time 10 minutes
    Cook Time 30 minutes
    Total Time 40 minutes
    Servings: 4
    Course: Main Course
    Cuisine: Comfort Food
    Calories: 350

    Ingredients
      

    • 1 tablespoon olive oil
    • 1 medium yellow onion diced
    • 3 cloves garlic minced
    • 2 cups cooked chicken, shredded
    • 1 can cannellini beans rinsed and drained
    • 1 can green chilies diced
    • 4 cups chicken broth low-sodium preferred
    • 1 teaspoon cumin
    • 1/2 teaspoon coriander
    • 1/2 teaspoon smoked paprika
    • 1 lime lime juiced, for finishing
    • 1/4 cup cilantro chopped, for garnish

    Equipment

    • Large heavy-bottomed pot
    • Sharp knife
    • Wooden spoon
    • Measuring spoons and cups
    • Lime squeezer

    Method
     

    1. Gather all your ingredients. Dice the onion and mince the garlic, setting them aside for the aromatics.
    2. Heat a large heavy-bottomed pot over medium heat and add a splash of olive oil until shimmering.
    3. Sauté the diced onion in the oil until it becomes translucent and fragrant, about 5 minutes. You should see it soften and turn a light golden color.
    4. Add the minced garlic to the onions and cook for another 30 seconds until fragrant, stirring constantly to avoid burning.
    5. Stir in the shredded cooked chicken, rinsed cannellini beans, and diced green chilies. Mix well to combine all ingredients.
    6. Pour in the chicken broth and add cumin, coriander, and smoked paprika. Stir to evenly distribute the spices.
    7. Bring the mixture to a gentle simmer and cook uncovered for about 20 minutes, stirring occasionally. The chili will thicken slightly and flavors will meld.
    8. Once simmered, squeeze fresh lime juice into the chili and stir in chopped cilantro for a bright, fresh finish.
    9. Taste and adjust seasoning if needed—adding more lime or spices for balance.
    10. Serve the hot white chicken chili in bowls, garnished with extra cilantro if desired, alongside crusty bread or tortilla chips.
    11. Enjoy the comforting aroma and velvety texture of this hearty chili, perfect for cozy nights.
    This chili isn’t just about warmth, it’s about comfort in a bowl. The smoky, bright flavors make it a perfect fix for a chilly afternoon, and it’s forgiving enough to tweak with what you have. Fold in a handful of shredded cheese or a dollop of sour cream if you’re feeling indulgent. Each spoonful should feel like a little bit of home, a simple pleasure we all need.

  • Stuffed Peppers Recipe: A Cozy, Unexpected Spin on a Classic

    Stuffed Peppers Recipe: A Cozy, Unexpected Spin on a Classic

    I’ve always loved stuffed peppers, but I used to get frustrated with soggy or undercooked ones. Then I started roasting peppers before filling them, which changed everything. The smoky aroma and slightly caramelized edges add a depth that raw peppers just can’t match. This recipe is my way of making the filling work with the peppers, not against them.

    Why I Keep Coming Back to This Recipe

    It’s forgiving and flexible, perfect for whatever I have in the fridge. The smoky aroma while baking is irresistible. Plus, it always feels like a little celebration—comfort wrapped in a bell pepper.

    Inside the Ingredients of Your Stuffed Peppers

    • Bell peppers: Colorful, sweet, and firm; roasting enhances their natural smoky notes.
    • Ground meat or beans: Provides protein, grounding the dish; choose chicken, beef, or hearty beans for texture.
    • Cooked rice: A neutral base that absorbs flavors; brown rice adds nuttiness.
    • Tomatoes: Juicy and bright, they add moisture and acidity.
    • Cheese: Melted, gooey, and golden; mozzarella for stretch, or cheddar for sharpness.
    • Spices & herbs: Cumin, paprika, and fresh parsley deepen flavor and freshness.
    • Onions & garlic: Fundamental aromatics that layer savory richness.

    Tools of the Trade for Stuffed Peppers

    • Oven-safe baking dish: To bake the stuffed peppers evenly.
    • Sharp knife: To cut the tops off peppers and carve out seeds.
    • Skillet or frying pan: To sauté the filling ingredients.
    • Spoon or small scoop: To stuff the peppers precisely.
    • Aluminum foil: To cover peppers if they start to brown too quickly.

    Step-by-Step on How to Perfectly Stuff and Bake Peppers

    Step 1: Preheat your oven to 190°C (375°F).

    Step 2: Slice the tops off the peppers and scoop out the seeds and membranes.

    Step 3: In a skillet, sauté chopped onions and garlic in olive oil until fragrant, about 3 minutes.

    Step 4: Add cooked rice, ground meat (or beans for a vegetarian version), chopped tomatoes, and spices. Cook until everything is heated through, about 5 minutes.

    Step 5: Stuff the peppers with the filling, place them in a baking dish, and top with shredded cheese.

    Step 6: Bake uncovered for 25-30 minutes until peppers are tender and cheese is bubbly and golden.

    Step 7: Let rest for 5 minutes before serving to let flavors meld.

    Cooking Checkpoints & Tips to Keep in Mind

    • Peppers should be tender but still hold their shape; test with a fork.
    • Cheese should be melted and slightly browned for that perfect crust.
    • Filling should be hot and bubbling when you take the dish out of the oven.
    • If peppers start to burn at the edges, cover with foil and lower oven temperature slightly.

    Common Mistakes and How to Fix Them

    • Peppers tear when cutting.? Use a sharp knife to avoid crushing peppers.
    • Cheese gets burnt before peppers are cooked.? Cover peppers with foil if cheese browns too fast.
    • Filling oozes out when sliced.? Let stuffed peppers rest for 5 minutes.
    • Overcooking or undercooking the peppers.? Check oven temperature with a thermometer.

    Roasted Stuffed Peppers with Savory Filling

    This dish features colorful bell peppers roasted until smoky and slightly caramelized, then filled with a flavorful mixture of ground meat or beans, cooked rice, tomatoes, and aromatic spices. The peppers are baked topped with melted cheese, resulting in a tender, slightly charred exterior and a hearty, gooey interior that’s both visually appealing and comforting.
    Prep Time 20 minutes
    Cook Time 30 minutes
    Total Time 50 minutes
    Servings: 4
    Course: Main Course
    Cuisine: International
    Calories: 350

    Ingredients
      

    • 4 large bell peppers any color, stems removed, seeds scooped out
    • 1 lb ground meat or beans ground meat (chicken, beef) or hearty beans cooked if using beans
    • 1 1/2 cups cooked rice preferably brown rice for nuttiness
    • 2 cups chopped tomatoes fresh or canned
    • 1 cup shredded cheese mozzarella or cheddar
    • 1 teaspoon cumin
    • 1 teaspoon paprika
    • 2 tablespoons olive oil
    • 1 bunch fresh parsley chopped, for garnish
    • 1 cup chopped onions
    • 2 cloves garlic minced

    Equipment

    • Oven-safe baking dish
    • Sharp knife
    • Skillet or frying pan
    • Spoon or small scoop
    • Aluminum foil

    Method
     

    1. Preheat your oven to 190°C (375°F). Place the whole bell peppers on a baking sheet and roast for about 20 minutes, turning once, until the skins are slightly charred and softened. Remove from oven and let cool slightly.
    2. While the peppers cool, heat olive oil in a skillet over medium heat. Add chopped onions and minced garlic, sautéing for about 3 minutes until fragrant and translucent.
    3. Add the cooked rice, ground meat or beans, chopped tomatoes, cumin, and paprika to the skillet. Stir well and cook for another 5 minutes, allowing flavors to meld and filling to heat through. Remove from heat and set aside.
    4. Slice off the tops of the roasted peppers and carefully scoop out seeds and membranes with a spoon, creating a hollow cavity for the filling. Be gentle to keep the peppers intact.
    5. Stuff each pepper generously with the prepared filling, pressing in so it’s slightly mounded on top.
    6. Place the stuffed peppers upright in an oven-safe baking dish. Sprinkle shredded cheese evenly over the top of each stuffed pepper.
    7. Cover the dish loosely with aluminum foil and bake for 25-30 minutes, until the peppers are tender and the cheese is melted and bubbly. Remove the foil in the last 5 minutes if you want a golden top.
    8. Carefully take the dish out of the oven and let the peppers rest for 5 minutes. Sprinkle chopped parsley on top for freshness.
    9. Serve the stuffed peppers warm, enjoying their smoky aroma and gooey cheese with a side salad or crusty bread if desired.

    Notes

    Ensure peppers are roasted until the skins are charred for maximum flavor. Resting the stuffed peppers allows the juices to settle, making them easier to serve.
    This dish is more than just a meal; it’s a little project that rewards you with warm, cheesy bites and bright, roasted peppers. It’s forgiving, adaptable, and perfect for when you want something hearty but not heavy. Feel free to swap ingredients or add herbs—this recipe invites your tweaks. Enjoy every forkful and get ready for leftovers that taste even better the next day.

  • Serena Williams Tacos: A Power-Packed Twist on a Classic

    Serena Williams Tacos: A Power-Packed Twist on a Classic

    This recipe started as a way to make my game-day snacks more substantial and nourishing, a kind of culinary victory lap. I wanted something hearty but still fresh, with a punch of flavor that matches Serena’s fierce spirit. It’s a reminder that even simple ingredients can deliver a knockout if you pay attention to the details.

    Why these tacos keep pulling me back

    They remind me that flavor and fire can come from simple ingredients. Every bite is a victory, a burst of heat and freshness that makes me feel alive. It’s my go-to when I need comfort but want to feel like I’ve crushed it in the kitchen.

    Breaking down the ingredients that pack a punch

    • Ground beef or chicken: Lean, juicy, and ready to soak up spices—use your favorite for a protein punch.
    • Smoked paprika: Gives a deep smoky flavor that elevates the meat—skip if you prefer milder.
    • Onions and bell peppers: Sautéed until tender, they add sweetness and crunch—swap for zucchini or mushrooms for variety.
    • Tortillas: Warm, soft, and pliable—corn or flour, depending on your mood.
    • Fresh cilantro and lime: Bright, zesty, and essential—don’t skip, or your tacos will miss their sparkle.
    • Spicy salsa or hot sauce: Adds a fiery kick—try chipotle if you want extra smoky heat.
    • Cheese (optional): Melted or crumbled, it adds richness—queso fresco or shredded cheddar work well.

    Tools of the trade for a winning taco

    • Cast-iron skillet: For that even, high-heat sear and smoky flavor.
    • Chef’s knife: Chopping vegetables and slicing meat efficiently.
    • Tongs: Turning and transferring ingredients without breaking them.
    • Microwave or dry pan: Warming tortillas quickly and evenly.
    • Measuring spoons: Ensuring perfect seasoning balance.

    Step-by-step for the ultimate power taco

    Step 1: Start by heating a cast-iron skillet over medium-high heat until it’s hot, about 5 minutes.

    Step 2: While the pan warms, season your beef or chicken with a pinch of salt, pepper, and smoked paprika.

    Step 3: Add a splash of oil—olive or avocado—and cook the meat until it’s nicely browned, about 8-10 minutes.

    Step 4: In the last 2 minutes, toss in chopped onions and peppers, cooking until they’re just soft and fragrant.

    Step 5: Warm your tortillas in a dry pan or microwave until they’re pliable—about 20 seconds.

    Step 6: Assemble the tacos by layering the cooked meat, sautéed veggies, and your favorite toppings like cilantro and lime.

    Step 7: Serve immediately while the tortillas are warm and the fillings are juicy and hot.

    Cooking checkpoints and tips to keep in mind

    • Ensure your pan is hot enough before adding the meat to get that perfect sear.
    • Don’t overcrowd the pan; work in batches if needed to keep the meat from steaming.
    • Keep an eye on the veggies—they should be tender but still have a slight crunch.
    • Taste your fillings before assembling—adjust seasoning if needed, especially salt and lime.

    Common mistakes and how to fix them

    • Cooking the meat too quickly at high heat.? SEARED MEAT WAS TOUGH. → Rest the meat for 5 minutes after cooking to keep it tender.
    • Overheating or over-drying tortillas.? TORTILLAS WERE DRY. → Wrap in a damp cloth and microwave 20 seconds.
    • Adding too much oil or cooking on high heat.? VEGGIES DROWNED IN OIL. → Cook on medium heat, stirring often.
    • Adding too much sauce or liquid ingredients.? TACOS WERE MUSHY. → Drain excess liquid from the meat and veggies.

    Power-Tacos with Smoky Meat and Fresh Veggies

    These hearty tacos feature flavorful, seasoned ground meat cooked with sautéed onions and bell peppers, all wrapped in warm tortillas. Topped with bright cilantro and lime, they deliver a satisfying combination of smoky, spicy, and fresh textures in every bite. Perfect as a game-day snack or comforting meal, they balance bold flavors with a vibrant, colorful presentation.
    Prep Time 15 minutes
    Cook Time 20 minutes
    Total Time 35 minutes
    Servings: 4
    Course: Main Course
    Cuisine: Mexican
    Calories: 350

    Ingredients
      

    • 1 lb ground beef or chicken lean and juicy
    • 1 tsp smoked paprika for smoky depth
    • 1 medium onion chopped
    • 1 bell pepper bell pepper chopped
    • 4 small tortillas warm and pliable
    • 1/4 cup fresh cilantro chopped
    • 1 lime lime cut into wedges
    • 1/2 cup spicy salsa or hot sauce for fiery kick
    • 1 cup cheese optional, shredded or crumbled
    • 1 tbsp oil olive or avocado

    Equipment

    • Cast-iron skillet
    • Chef’s knife
    • Tongs
    • Microwave or dry pan
    • Measuring spoons

    Method
     

    1. Heat your cast-iron skillet over medium-high heat until it’s hot and starts to shimmer, about 5 minutes.
    2. While the pan heats, season the ground meat with a pinch of salt, pepper, and smoked paprika, then break it apart with your hands or a spoon to distribute the spices evenly.
    3. Add a splash of oil to the hot skillet and carefully place the meat in, spreading it out to a thin layer. Let it sear without stirring for 2-3 minutes, until it starts to develop a nice brown crust.
    4. Stir the meat with tongs or a spoon, breaking it into smaller pieces, and cook until fully browned and cooked through, about 8-10 minutes. The meat should sizzle and release a savory aroma.
    5. In the last 2 minutes of cooking, add chopped onions and bell peppers to the skillet. Stir and cook until they soften slightly, becoming fragrant and tender but still retaining some crunch.
    6. While the filling cooks, warm the tortillas in a dry pan over medium heat or microwave wrapped in a damp cloth for about 20 seconds until soft and pliable.
    7. Once everything is ready, assemble your tacos by spooning the flavorful meat and veggie mixture into the warm tortillas. Top with chopped cilantro, a squeeze of lime, and your favorite spicy salsa or hot sauce.
    8. If desired, sprinkle shredded cheese over the hot filling and let it melt slightly before serving.
    9. Serve immediately, garnished with extra lime wedges and cilantro for a fresh, fiery bite.

    Notes

    For extra smoky flavor, use smoked paprika and a cast-iron skillet. Adjust spice levels with hot sauce or salsa as preferred. Make sure to drain excess liquid from the filling to keep the tacos from becoming mushy.
    Tacos like these aren’t just food; they’re a statement. Filling, flavorful, with a touch of chaos—perfect for a busy night or a spontaneous feast. Feel free to tweak the toppings or spice level to match your mood. Each bite is a reminder that a great meal can be simple, honest, and full of punch.

  • Emeril Lagasse’s Jambalaya: A Deep Dive into the Soul of Creole Cooking

    Emeril Lagasse’s Jambalaya: A Deep Dive into the Soul of Creole Cooking

    Jambalaya has always been a dish I turn to when I want something hearty and alive with flavor. It’s a one-pot wonder that captures the chaos and warmth of Creole kitchens, where every ingredient plays a part in the story. The beauty is in its adaptability—you can tweak ingredients based on what’s in your fridge or mood.

    Why I keep coming back to this jambalaya

    It’s a dish that reminds me of family, of noisy Sunday dinners. The process is forgiving, and the flavors develop with each step, making every pot a little different but always satisfying. It’s honest, unpretentious, and somehow always hits the spot, especially after a busy day when I crave something genuine.

    The ingredients that make or break this jambalaya

    • Smoked sausage: I love the punch it adds, but turkey sausage works in a pinch if you want less fat.: Gives a smoky, savory backbone to the dish, with a juicy bite and crispy edges.
    • Long-grain rice: Opt for a fluffy, separate grain, not sticky. Brown rice can be a hearty swap.: Absorbs flavors beautifully and holds texture.
    • Bell peppers: Use a mix of colors for visual pop and sweetness. Red or yellow bring a brighter flavor.: Adds crunch and a hint of sweetness.
    • Cayenne pepper: Adjust to taste, but a pinch amplifies heat and depth.: Gives a spicy kick without overwhelming.
    • Tomatoes: Use canned crushed for convenience or fresh for brightness. They provide acidity and richness.: Lends a tangy, umami base.
    • Chicken broth: Use homemade if possible, or a good-quality store-bought version.: Infuses the rice with savory depth.
    • Seasonings: Thyme, paprika, and bay leaves—these are your flavor anchors.: Create layers of complexity and warmth.

    Tools of the trade for a perfect jambalaya

    • Large heavy-bottomed pot: Ensures even heat distribution, preventing rice from scorching.
    • Sharp knife: Preps vegetables and meats efficiently.
    • Wooden spoon: Stirs gently without damaging the pot or breaking down ingredients.
    • Measuring cup: Keeps seasonings and liquids in perfect balance.

    Step-by-step guide to mastering jambalaya

    Step 1: Gather your equipment: a large heavy-bottomed pot, a sharp knife, a wooden spoon, and a measuring cup.

    Step 2: Heat oil over medium heat (about 160°C/320°F). Add diced onions, bell peppers, and celery. Sauté until fragrant and slightly softened, about 5 minutes.

    Step 3: Add smoked sausage slices; cook until they caramelize and release smoky aroma, about 8 minutes.

    Step 4: Stir in minced garlic and crushed tomatoes; cook for another 2 minutes until the mixture darkens slightly.

    Step 5: Pour in chicken broth and add seasonings: thyme, cayenne, paprika. Bring to a gentle simmer.

    Step 6: Add rice, stir well, and cover. Reduce heat to low (about 90°C/195°F). Cook for 20-25 minutes until rice is tender and liquid absorbed.

    Step 7: Check the rice: it should be plump and slightly chewy. Adjust seasoning if needed.

    Step 8: Rest the jambalaya: turn off heat and let sit, covered, for 5 minutes. Fluff with a fork before serving.

    Cooking checkpoints and tips to keep in mind

    • Ensure the rice is not overcooked; it should be tender but still hold its shape.
    • Smell for a deep, smoky aroma—if it’s not there, your sausage might need a little longer caramelizing.
    • Look for a slight darkening of the tomato mixture—this adds depth and richness to the flavor.

    Common mistakes and how to fix them

    • Cooking the rice too long.? If the rice is mushy, reduce cooking time and add a splash of broth to loosen.
    • Skipping browning the sausage.? If the sausage isn’t smoky enough, give it a quick sear before adding to the pot.
    • Under-seasoned.? If the dish is bland, boost with a splash of hot sauce or more seasoning.
    • Heat too high.? If the mixture sticks to the bottom, stir more frequently and lower the heat.

    Creole Jambalaya

    Creole jambalaya is a hearty, one-pot dish featuring smoky sausage, colorful bell peppers, and fluffy long-grain rice, all simmered with seasoned tomatoes and chicken broth. Its final texture is tender yet slightly chewy, with vibrant flavors and a satisfying, rustic appearance. The dish embodies warm, bold flavors with a comforting, communal feel.
    Prep Time 15 minutes
    Cook Time 30 minutes
    Total Time 45 minutes
    Servings: 4
    Course: Main Course
    Cuisine: Creole
    Calories: 430

    Ingredients
      

    • 1 lb smoked sausage sliced
    • 1 1/2 cups long-grain rice rinsed
    • 1 red bell pepper diced
    • 1 yellow bell pepper diced
    • 1 medium onion diced
    • 2 cloves garlic minced
    • 1 can (14 oz) crushed tomatoes
    • 3 cups chicken broth preferably homemade
    • 1 tsp thyme
    • 1/2 tsp paprika
    • 1/4 tsp cayenne pepper adjust to taste
    • 2 tbsp oil vegetable or olive oil

    Equipment

    • Large heavy-bottomed pot
    • Sharp knife
    • Wooden spoon
    • Measuring cup

    Method
     

    1. Gather your equipment: a large heavy-bottomed pot, a sharp knife, a wooden spoon, and a measuring cup.
    2. Heat the oil over medium heat until it shimmers and begins to ripple, about 2 minutes. Add diced onions, bell peppers, and celery if using; sauté until fragrant and slightly softened, around 5 minutes, until they turn translucent and the mixture smells sweet.
    3. Add the sliced smoked sausage to the pot and cook, stirring occasionally, until it caramelizes and releases a smoky aroma, about 8 minutes. The edges should turn golden brown and crispy.
    4. Stir in the minced garlic and crushed tomatoes; cook for another 2 minutes, allowing the mixture to darken slightly and smell rich and savory.
    5. Pour in the chicken broth and add the thyme, paprika, cayenne pepper, and bay leaves. Bring the mixture to a gentle simmer, with small bubbles breaking the surface and a fragrant aroma filling the air.
    6. Stir in the rinsed rice, making sure it’s evenly distributed in the pot. Cover with a lid and reduce the heat to low, about 90°C (195°F). Let it cook undisturbed for 20-25 minutes, until the rice is tender and has absorbed most of the flavorful liquid.
    7. Check the rice: it should be plump, slightly chewy, and the mixture should look thickened and vibrant. Remove the bay leaves and taste for seasoning, adjusting with salt or hot sauce if needed.
    8. Turn off the heat and let the jambalaya rest, covered, for 5 minutes. This allows the flavors to meld and the rice to settle.
    9. Fluff the jambalaya gently with a fork to loosen the rice and distribute the ingredients evenly. Serve hot, garnished with chopped herbs if desired, and enjoy the comforting, smoky flavors.
    This dish is a testament to patience and layered flavors. The smoky sausage, tender rice, and bright seasoning come together in a way that feels both comforting and celebratory. Feel free to personalize with seafood or extra spice as you like, but don’t skip the resting—those few minutes let everything meld beautifully. A good jambalaya is messy, loud, and utterly worth every spoonful.

  • Rachael Ray’s 30-Minute Meals: A Quick Fix with a Twist of Comfort

    Rachael Ray’s 30-Minute Meals: A Quick Fix with a Twist of Comfort

    This recipe is about making a meal in a flash but still feeling like a proper sit-down dinner. It’s the kind of thing that saves your weeknights, turning chaos into something manageable. I love how adaptable it is—use what you’ve got, skip what you don’t, and still end up with something delicious.

    Why I Keep Coming Back to This Recipe

    It’s fast, versatile, and forgiving—perfect for days when I want a good meal without fuss. The balance of flavors always feels just right, and it’s a dish I can customize endlessly, which keeps it fresh and exciting. Plus, it’s a reminder that good food doesn’t need hours—just some savvy shortcuts and honest ingredients.

    Breaking Down the Main Players

    • Aromatics (garlic, onion): Base flavors that fill the kitchen with a pungent, comforting aroma—use fresh for sharpness or roasted for sweetness.
    • Protein (chicken, tofu): The heart of the dish—choose based on your mood and dietary needs, cooked until just tender.
    • Sauce (tomato, cream): Brings everything together with a rich, oozy texture or bright acidity—swap for coconut milk for a dairy-free twist.
    • Herbs & lemon: Fresh herbs brighten the dish; lemon adds a zing—don’t skip these for that final flavor pop.
    • Pasta or rice: The canvas for your sauce—al dente is the goal, tender but with a slight bite.

    Tools & Equipment You’ll Need

    • Large skillet: For cooking everything in one pan, quick and easy cleanup.
    • Sharp knife: To chop aromatics and proteins quickly and safely.
    • Wooden spoon: Stirring and scraping the skillet to prevent sticking and promote even cooking.

    Step-by-Step: Mastering the 30-Minute Meal with Confidence

    Step 1: Gather your essentials: a large skillet, a sharp knife, and a wooden spoon for stirring.

    Step 2: Start by heating the skillet over medium-high heat, about 180°C/350°F, until it’s hot but not smoking.

    Step 3: Add a splash of olive oil, let it shimmer, then toss in your aromatics—garlic and onion—cook until fragrant, about 2 minutes.

    Step 4: Incorporate your main protein, like chicken or tofu, season well, and cook until browned, roughly 5-7 minutes.

    Step 5: Pour in your sauce—think tomato or creamy—let it simmer for 10 minutes, stirring occasionally, until flavors meld.

    Step 6: Meanwhile, cook pasta or rice according to package instructions, about 8-10 minutes.

    Step 7: Drain, then toss everything together in the skillet, letting flavors combine for a few minutes.

    Step 8: Finish with fresh herbs, a squeeze of lemon, or a sprinkle of cheese, and serve hot.

    Cooking Checkpoints & Tips for Success

    • Ensure your pan is hot enough before adding ingredients to prevent sticking.
    • Cook proteins until they are just done—overcooking makes them tough.
    • Taste and adjust seasonings at the end—sometimes a pinch of salt or a squeeze of lemon makes all the difference.

    Common Mistakes & How to Fix Them

    • Burnt bits on the pan? Add a splash of water or broth to loosen stuck bits, then simmer briefly.
    • Over-torched garlic or spices? Reduce heat immediately and add more oil to prevent burning.
    • Undercooked proteins? Remove from heat and stir in a bit of cold water to stop further cooking.
    • Dry, tough meat or tofu? Cover and cook a few minutes longer, then check for doneness.

    Quick & Versatile One-Pan Pasta

    This dish combines aromatics, protein, and a flavorful sauce all cooked together in a single skillet, resulting in a hearty, comforting meal with a rich, well-coated pasta or rice. The final dish has a tender texture with a vibrant sauce clinging to every bite, perfect for busy weeknights. Its adaptable nature allows for endless ingredient swaps, making it a go-to for quick, satisfying dinners.
    Prep Time 10 minutes
    Cook Time 20 minutes
    Total Time 30 minutes
    Servings: 4
    Course: Main Course
    Cuisine: International
    Calories: 450

    Ingredients
      

    • 3 cloves garlic minced
    • 1 medium onion finely chopped
    • 2 cups protein chicken pieces or cubed tofu
    • 1 cup sauce tomato or creamy sauce
    • 1 tablespoon olive oil
    • 8 oz pasta or rice dry weight
    • to taste fresh herbs parsley or basil, chopped
    • 1 lemon lemon juiced, for finishing

    Equipment

    • Large skillet
    • Sharp knife
    • Wooden spoon

    Method
     

    1. Heat a large skillet over medium-high heat until it shimmers slightly, then add a splash of olive oil.
    2. Add the minced garlic and chopped onion to the skillet. Cook, stirring frequently, until fragrant and translucent, about 2 minutes, filling your kitchen with a warm aroma.
    3. Push the aromatics to one side of the skillet, then add your protein—whether chicken pieces or tofu—and cook until browned and cooked through, about 5-7 minutes.
    4. Pour in the sauce of your choice, stirring to combine everything. Let it simmer gently for about 10 minutes, allowing the flavors to meld and the sauce to thicken slightly.
    5. Meanwhile, cook your pasta or rice according to package instructions until al dente—tender but with a slight bite, about 8-10 minutes.
    6. Drain the cooked pasta or rice, then add it directly into the skillet with the sauce and protein. Toss everything together with your wooden spoon, ensuring each piece is coated with the flavorful sauce.
    7. Sprinkle with freshly chopped herbs and squeeze fresh lemon juice over the dish. Toss again to distribute the bright flavors evenly.
    8. Check the seasoning and adjust with salt, pepper, or more lemon if needed. Serve hot, straight from the skillet for a relaxed, family-style meal.

    Notes

    Feel free to swap in your favorite proteins or sauces to keep this dish fresh and exciting. For a vegetarian version, use tofu and a veggie-based sauce.
    These recipes are a lifeline on busy nights, proving that you can whip up something satisfying without spending hours in the kitchen. The beauty lies in their flexibility—swap ingredients, tweak flavors, and make it your own. Keep this approach handy—it’s a good way to turn everyday ingredients into something that feels special, even in a rush.

  • Bobby Flay Burger Recipe: A Juicy, Flavor-Packed Classic with a Twist

    Bobby Flay Burger Recipe: A Juicy, Flavor-Packed Classic with a Twist

    Bobby Flay’s burger recipe is a reminder that a great burger starts with simple, quality ingredients. But it’s also about understanding the heat and timing, that delicate dance that turns raw meat into something irresistible. I’ve found that the secret sometimes lies in the small adjustments—like how long to sear or how gently to handle the patties.

    Why I keep coming back to this burger recipe

    It’s the kind of dish that reminds me of summer cookouts, chaos and all. The simplicity makes every bite satisfying, and each tweak reveals a new flavor. When I crave comfort or a quick win, this burger hits every time. It’s a canvas for experimentation, yet reliably delivers that smoky, juicy bite I love.

    Breaking down the ingredients for a better burger

    • Ground beef (80/20): Juicy, flavorful, with enough fat for tenderness—swap for ground turkey if you prefer leaner.
    • Cheddar cheese: Melts beautifully, adding a salty, sharp note—try pepper jack for spice.
    • Burger buns: Soft yet sturdy, toasted lightly for crunch—whole wheat works if you want more fiber.
    • Onions: Adds sharpness and crunch—red onions give color, but sweet Vidalia is mellow.
    • Pickles: Vinegary and tangy, they cut through richness—dill pickles are classic, but bread-and-butter work too.
    • Condiments: Ketchup, mustard, or aioli—choose your flavor profile for that finishing touch.

    Tools of the trade for burger mastery

    • Cast-iron skillet: Provides even heat and a perfect sear.
    • Probe thermometer: Ensures the burger is cooked to your desired doneness.
    • Spatula: Helps flip and handle the patties gently.
    • Buns: To cradle all that juicy goodness.
    • Knife and cutting board: Prep toppings and condiments.

    Step-by-step: mastering the perfect Bobby Flay burger

    Step 1: Gather your ingredients and prep your workspace. A clean, organized counter makes all the difference.

    Step 2: Shape the beef mixture gently into patties, about 150g each. Don’t overwork the meat—loose is juicy.

    Step 3: Heat a cast-iron skillet over medium-high heat, around 200°C/390°F. Add a splash of oil and let it shimmer.

    Step 4: Place patties in the hot skillet, pressing down slightly to get a good sear. Cook for 3-4 minutes until the edges are golden.

    Step 5: Flip the patties, cook for another 3-4 minutes, or until they reach 65°C/149°F internally. Use a probe thermometer for precision.

    Step 6: In the last minute, melt cheese on top if you like. Toast buns lightly in the pan for extra flavor.

    Step 7: Rest the burgers for 2 minutes off the heat. Assemble immediately with your preferred toppings and condiments.

    Cooking checkpoints and tips for burger perfection

    • Look for a deep, golden crust on the patty—this is the Maillard reaction in action.
    • Use a probe thermometer to avoid overcooking or undercooking.
    • Press the meat just slightly when searing—don’t flatten, or you’ll lose juices.

    Common burger mistakes and how to fix them

    • Burger sticking and tearing when flipping.? Use a hot skillet to prevent sticking and achieve a good sear.
    • Squashing the burger to release juices.? Don’t press down hard on the patties—loose meat stays juicy.
    • Constant flipping leading to uneven cooking.? Flip only once for a crusty exterior.
    • Juices running out when cut too soon.? Let the burger rest before serving.

    Classic Juicy Cheeseburger

    This burger features a juicy, well-seasoned ground beef patty seared to golden perfection, topped with melted cheddar cheese and nestled in toasted buns. The process involves shaping, searing, and assembling with fresh toppings to create a satisfying, flavorful bite with a crispy exterior and tender interior.
    Prep Time 15 minutes
    Cook Time 10 minutes
    Total Time 25 minutes
    Servings: 4
    Course: Main Course
    Cuisine: American
    Calories: 550

    Ingredients
      

    • 600 g ground beef (80/20) preferably divided into 4 portions
    • 4 slices cheddar cheese or your favorite melting cheese
    • 4 buns burger buns lightly toasted
    • 1 medium onion sliced thin
    • 4 spears pickles dill or bread-and-butter
    • to taste ketchup, mustard, or aioli for serving

    Equipment

    • Cast-iron skillet
    • Probe thermometer
    • Spatula
    • Knife and cutting board

    Method
     

    1. Gently divide the ground beef into four equal portions and shape each into a loose, round patty about 150g, being careful not to overwork the meat to keep it juicy.
    2. Preheat your cast-iron skillet over medium-high heat until it’s hot and shimmering, emitting a faint sizzling sound when a few drops of water are flicked on it.
    3. Add a splash of oil to the skillet and place the patties carefully in the hot pan, pressing lightly to ensure good contact with the surface and a nice sear.
    4. Sear the patties for about 3-4 minutes until the edges turn golden and develop a deep crust, creating that irresistible Maillard reaction aroma.
    5. Flip the patties gently with a spatula, then cook for another 3-4 minutes until they reach an internal temperature of 65°C/149°F, using a probe thermometer for precision.
    6. In the last minute of cooking, place a slice of cheddar on each patty and cover briefly if needed to melt the cheese evenly.
    7. While the burgers finish, lightly toast the buns in the skillet until golden brown and fragrant, about 1-2 minutes.
    8. Remove the patties and buns from heat; let the burgers rest for a minute to retain their juices.
    9. Spread condiments on the buns, then layer with the cooked patties, adding slices of onion and pickles to your liking.
    10. Top with the remaining bun, gently press down, and serve immediately with your favorite sides for a satisfying meal.

    Notes

    For an extra smoky flavor, add a pinch of smoked paprika to the beef before shaping. Resting the burger briefly helps keep it juicy when bitten into.
    This burger recipe isn’t just about the beef; it’s about the process of balancing heat, timing, and patience. The sear gives a smoky, caramelized crust, while the inside stays juicy and tender. It’s a straightforward recipe that rewards you with rich, satisfying bites every time. Feel free to tweak toppings—sometimes a quick pickled onion or spicy aioli can elevate the whole experience.