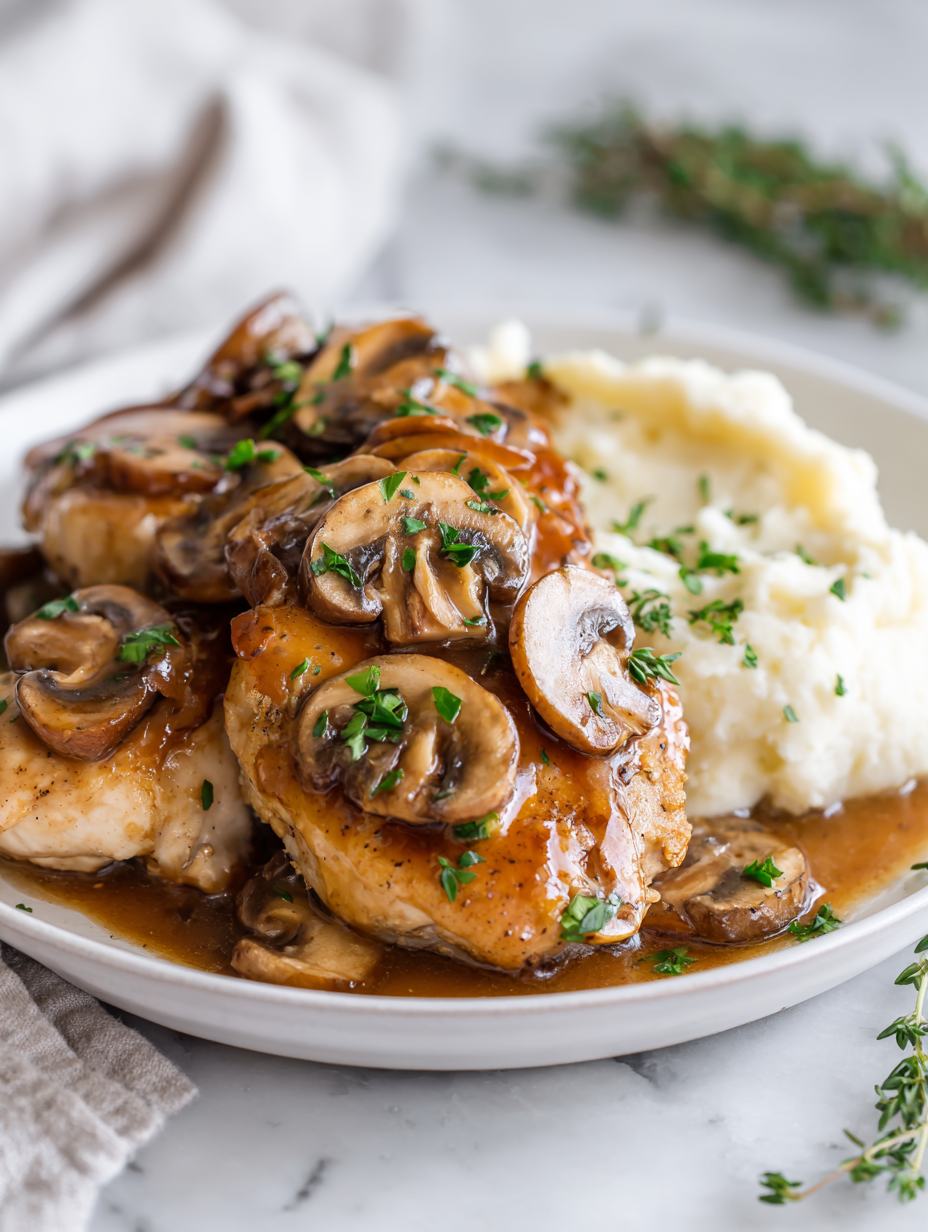
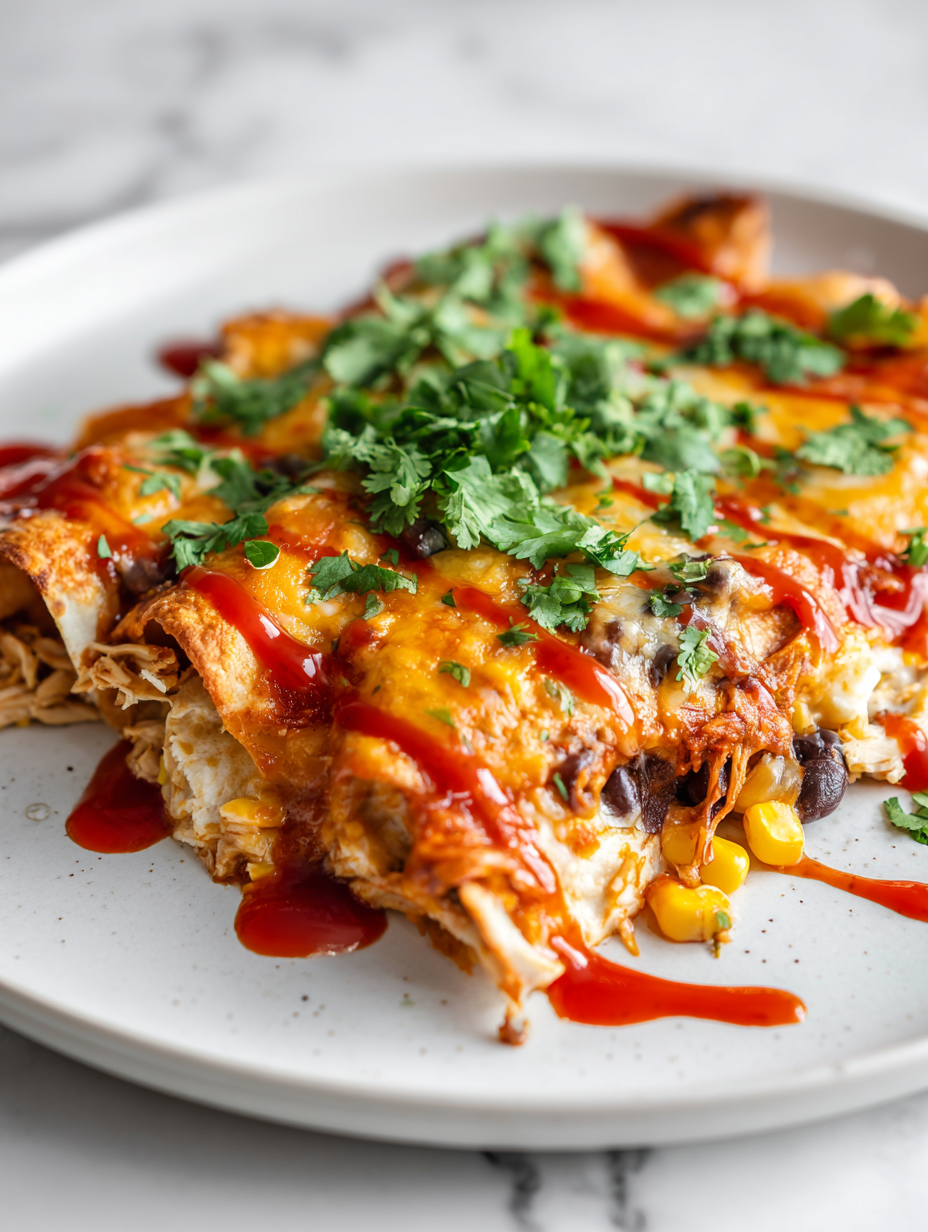
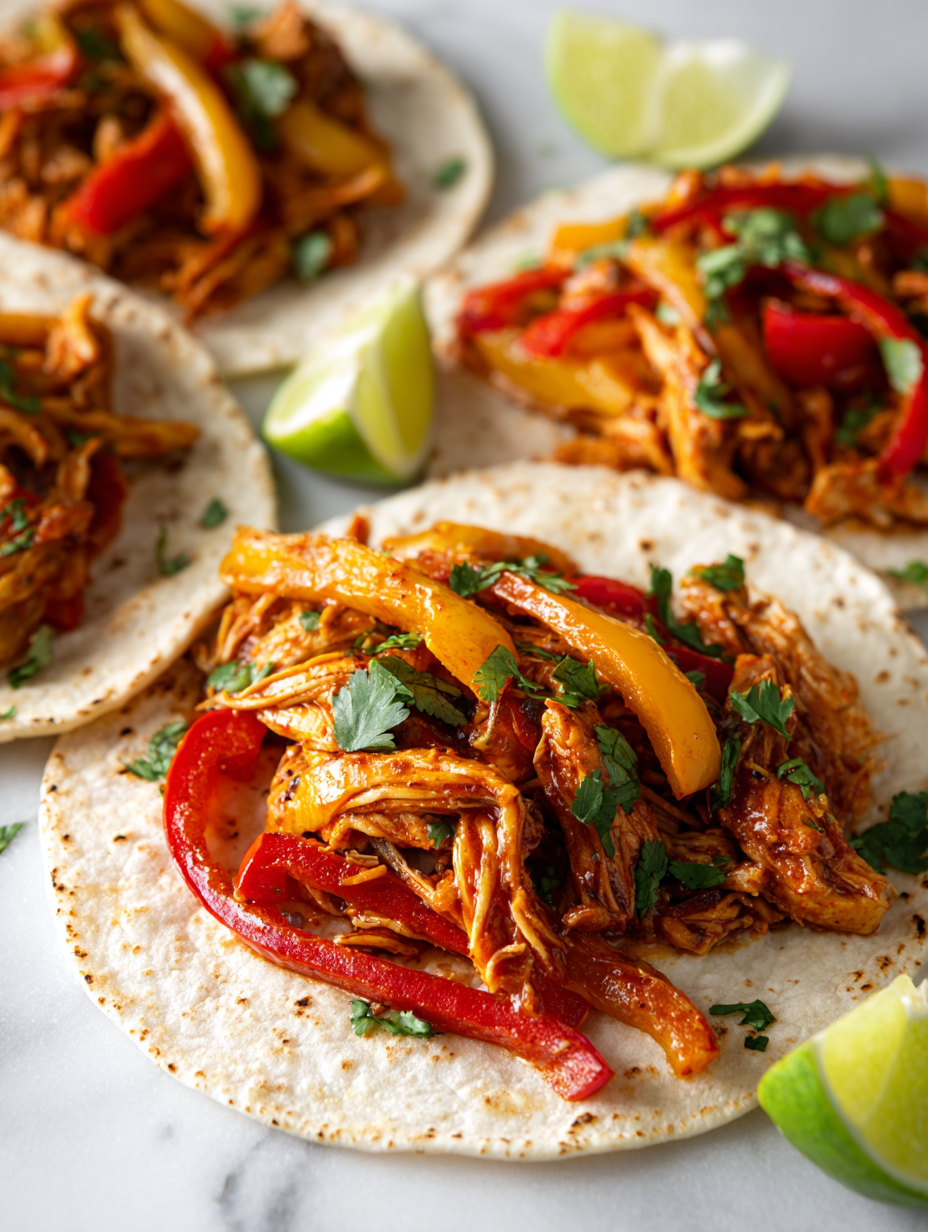
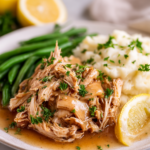
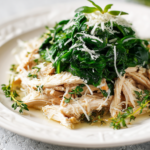
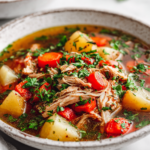
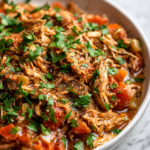
Category: Main Course

  • Jamie Oliver’s Chicken Fajitas with a Twist: The Secret to Juicier, More Flavorful Wraps

    Jamie Oliver’s Chicken Fajitas with a Twist: The Secret to Juicier, More Flavorful Wraps

    Fajitas always felt like a weekend treat, something to make when you’ve got a bit of time and patience. But this recipe cuts down the fuss without losing the soul of those smoky, flavorful wraps. It’s about capturing that perfect balance of tender chicken and caramelized peppers, with just enough spice.
    What I love is how flexible it is—add more heat, skip the cheese, or throw in some fresh herbs. It’s a meal that’s forgiving and rooted in honest, straightforward flavors. Plus, it smells incredible while cooking, the kind of aroma that pulls everyone to the kitchen.

    Why I keep making these fajitas

    The balance of smoky, tender chicken and sweet peppers hits a familiar spot. It’s honest, quick, and flexible—perfect for busy nights or lazy weekends. Plus, the smell alone makes the whole house feel lively, a reminder that good food doesn’t need fuss.

    What’s in my fajitas? The honest breakdown

    • Chicken breasts: Lean, tender, quick-cooking meat that absorbs flavors well. Swap with turkey or even tofu for a different vibe.
    • Bell peppers: Sweet and smoky, their color adds vibrancy. Use red, yellow, or orange for extra sweetness or green for crunch.
    • Onions: Caramelizes beautifully and adds depth. Red onions give a sharper bite, while yellow is milder.
    • Lime juice: Brightens everything with a zesty punch—don’t skip it or switch with lemon for a slightly different tang.
    • Spices (paprika, cumin): Smoky and earthy, they build depth. Use smoked paprika for a richer aroma, or swap with chili powder.
    • Tortillas: Warm, soft, and flexible—corn or flour, your call. Keep them warm to prevent cracking.
    • Olive oil: For searing; choose a good quality oil that withstands high heat.

    Tools of the trade for perfect fajitas

    • Large skillet or cast-iron pan: To get a good sear and smoky flavor on the chicken and veggies.
    • Sharp knife: For slicing chicken, peppers, and onions evenly.
    • Cutting board: To prep ingredients safely and efficiently.
    • Tongs or spatula: To flip and stir ingredients without breaking them.
    • Measuring spoons and lime juicer: For precise seasoning and fresh citrus boost.

    The Process: Juicy Chicken and Vibrant Veggies in Minutes

    Step 1: Start by prepping the chicken—slice into thin strips, about 1.5 cm wide. Mix with a pinch of salt, pepper, and a splash of lime juice. Let it marinate for at least 15 minutes while you prep other ingredients.

    Step 2: Heat a large skillet over medium-high (around 200°C/390°F). Add a drizzle of oil, then toss in the chicken. Cook for 5-7 minutes, stirring frequently, until nicely browned and cooked through. If it starts to stick, a little more oil helps.

    Step 3: Remove the chicken and set aside. In the same pan, toss in sliced peppers and onions—cook for about 5 minutes until they soften and get a little char on the edges. Add a pinch of smoked paprika and cumin for smokiness.

    Step 4: Return the chicken to the pan. Stir everything together, cook for another 2 minutes so flavors meld. Check if chicken is juicy and peppers are vibrant. Serve with warm tortillas and your favorite toppings.

    Cooking checkpoints: How to tell it’s perfect

    • Chicken should be juicy and slightly charred, not dry or burnt.
    • Veggies need to be tender but still have a slight crunch and vibrant color.
    • The tortillas should be warm and pliable, not cracked or cold.

    Avoid these common fajita mistakes

    • Leaving chicken on too long makes it dry.? OVERCOOKED CHICKEN—Cook for less time, check for slight juiciness and a light pink center.
    • Veggies turn soggy and dull.? NOT ENOUGH CHAR—Increase heat or cook in batches to avoid steaming, which dulls flavor.
    • Cold tortillas crack and tear.? TORTILLAS TOO COLD—Warm them briefly in a dry pan or microwave before serving.
    • Dishes taste flat and underwhelming.? LACK OF SEASONING—Taste the marinade and adjust salt or lime for punch.

    Simple Chicken Fajitas

    This chicken fajitas recipe features tender, smoky chicken strips cooked with caramelized peppers and onions, all flavored with spices and a splash of lime. The dish emphasizes quick searing and sautéing, resulting in vibrant, juicy ingredients wrapped in warm tortillas for a flavorful, colorful meal with a smoky aroma.
    Prep Time 20 minutes
    Cook Time 15 minutes
    Total Time 35 minutes
    Servings: 4
    Course: Main Course
    Cuisine: Mexican
    Calories: 350

    Ingredients
      

    • 2 large chicken breasts sliced into thin strips
    • 3 bell peppers bell peppers sliced into strips, use mixed colors
    • 1 large onion sliced into strips
    • 2 tbsp olive oil for searing and sautéing
    • 1 tsp smoked paprika for smoky flavor
    • 1 tsp cumin ground
    • 1 tbsp lime juice freshly squeezed
    • 8 tortillas warm before serving

    Equipment

    • Large skillet or cast-iron pan
    • Sharp knife
    • Cutting board
    • Tongs or spatula
    • Measuring spoons

    Method
     

    1. Slice the chicken breasts into thin strips, about 1.5 cm wide, and toss with a splash of lime juice, salt, and pepper. Let marinate briefly while you prepare the vegetables.
    2. Heat a large skillet over medium-high heat and add 1 tablespoon of olive oil. Once shimmering, add the chicken strips in a single layer, cooking for 5-7 minutes, stirring occasionally, until they’re golden brown and cooked through. Remove and set aside.
    3. Using the same pan, add the sliced peppers and onions. Cook for about 5 minutes, stirring frequently, until they soften and develop a slight char on the edges. Sprinkle in smoked paprika and cumin for smoky depth.
    4. Return the cooked chicken to the skillet with the vegetables. Stir everything together and cook for another 2 minutes, allowing flavors to meld and ingredients to heat through. The mixture should be juicy and fragrant.
    5. Warm the tortillas in a dry skillet or microwave until soft and pliable. Wrap them in a clean towel if serving immediately.
    6. To serve, spoon the chicken and vegetable mixture onto warm tortillas, squeeze over fresh lime juice, and enjoy the smoky, flavorful bites with vibrant colors and tender textures.
    Once you get the hang of the marinade and searing, these fajitas become a quick weeknight staple. The combination of smoky peppers and tender chicken wrapped in a warm tortilla never gets old. Feel free to customize with avocado, salsa, or a squeeze of lime. These wraps are honest food—simple, satisfying, and endlessly adaptable.

  • Stanley Tucci’s Pasta alla Norma: a surprisingly humble yet soul-stirring Italian classic

    Stanley Tucci’s Pasta alla Norma: a surprisingly humble yet soul-stirring Italian classic

    I’ve always loved how Pasta alla Norma manages to be both rustic and refined. It’s one of those dishes that feels like it’s holding a story—about Sicily, about summer, about family dinners. But honestly, I also love how forgiving it is. You don’t need perfect ingredients, just honest effort and a little patience.

    Why I keep returning to this recipe

    It’s a dish that feels like a conversation—simple ingredients, honest flavors, no fuss. It’s perfect for summer nights when basil and tomatoes are at their peak. Plus, it’s forgiving: a splash more oil or a pinch of chili, and it’s still delicious.

    What makes this dish work: a breakdown of key ingredients

    • Eggplant: I love its creamy texture once cooked—it soaks up flavors and adds a smoky note. Skip it if you hate frying, but don’t expect the same depth.: Eggplant acts as the hearty backbone, tender yet slightly crisp, with a smoky aroma.
    • Tomatoes: Ripe, juicy, and sweet—preferably San Marzano or any good-quality canned plum tomatoes.: They create a rich, slightly tangy sauce that balances the eggplant.
    • Garlic: Gives a pungent, aromatic punch—use fresh for a vibrant, zesty flavor.: It’s the fragrant foundation that lifts the sauce.
    • Basil: Sweet, peppery leaves—add at the end to keep their scent alive.: Fresh basil brightens the dish and adds a herbal punch.
    • Ricotta salata or Pecorino Romano: Salty, crumbly cheese—grate liberally for a finishing touch.: It adds a salty, umami bite that contrasts with the sweetness of tomatoes.
    • Chili flakes: Just enough to make your lips tingle—adjust to spice preference.: A little heat that complements the richness.

    Tools of the trade for a successful Norma

    • Large pot: For boiling pasta to al dente.
    • Deep skillet or frying pan: To cook the eggplant and sauce.
    • Slotted spoon: For removing eggplant from oil or water.
    • Chef’s knife: Chopping garlic, basil, and eggplant.
    • Measuring spoons: Accurately measure salt, chili flakes, and spices.

    The soulful steps to make Pasta alla Norma

    Step 1: Start by boiling a large pot of salted water—think sea-worthy, about 4 liters (roughly 1 gallon).

    Step 2: While the water heats, peel and cube the eggplant into roughly 1-inch pieces; sprinkle with salt and let sit for 20 minutes.

    Step 3: Heat a generous splash of olive oil in a deep skillet over medium heat—about 180°C (350°F).

    Step 4: Add the eggplant and cook, stirring occasionally, until golden and soft, about 10-12 minutes.

    Step 5: Meanwhile, cook the pasta until al dente, about 1 minute less than package instructions.

    Step 6: In a separate pan, sauté garlic and crushed red pepper in olive oil until fragrant—about 1-2 minutes.

    Step 7: Add crushed tomatoes to the garlic and chili, simmering gently for 15 minutes, stirring occasionally.

    Step 8: Drain the pasta, saving some pasta water. Toss the pasta with the eggplant and tomato sauce.

    Step 9: Finish with a generous handful of basil leaves and grated ricotta salata or Pecorino Romano.

    Step 10: Serve hot, with extra cheese and basil if you like.

    Cooking checkpoints to keep you on track

    • Eggplant should be golden and slightly crisp at the edges.
    • Pasta should be just tender, with a slight bite—al dente.
    • Tomato sauce needs to be thick enough to coat the pasta without pooling.
    • Basil leaves should be fragrant, not burnt, when added at the end.

    Common pitfalls and how to fix them

    • Eggplant gets oily and mushy.? IF THE EGGPLANT IS TOO SOGGY, DRAIN AND PAT DRY BEFORE FRYING.
    • Tomatoes taste harsh or too tangy.? IF THE SAUCE IS TOO ACIDIC, ADD A PINCH OF SUGAR OR BAKING SODA.
    • Pasta clumping or sticking.? IF THE PASTA STICKS, STIR MORE OFTEN AND USE ENOUGH SALT IN THE WATER.
    • Basil wilts and loses scent.? IF THE BASIL TURNS BROWN, ADD IT AT THE VERY LAST MINUTE.

    Pasta alla Norma

    Pasta alla Norma is a rustic yet refined Sicilian dish featuring tender eggplant, sweet tomato sauce, and fresh basil, finished with grated cheese. The dish combines frying, simmering, and tossing to create a hearty, flavorful pasta with a beautiful, vibrant appearance. The final texture is tender eggplant coated in rich sauce, topped with fragrant herbs and crumbly cheese.
    Prep Time 20 minutes
    Cook Time 30 minutes
    Total Time 50 minutes
    Servings: 4
    Course: Main Course
    Cuisine: Sicilian
    Calories: 550

    Ingredients
      

    • 1 pound eggplant peeled and cubed
    • 4 liters water for boiling pasta
    • 12 ounces pasta (penne or spaghetti) al dente
    • 3 tablespoons olive oil divided, for frying and sauce
    • 4 cloves garlic minced
    • 28 ounces canned crushed tomatoes preferably San Marzano
    • 1/2 teaspoon chili flakes adjust to taste
    • a handful fresh basil leaves roughly torn, added at the end
    • 1/2 cup ricotta salata or Pecorino Romano grated for finishing
    • to taste salt

    Equipment

    • Large pot
    • Deep skillet or frying pan
    • Slotted spoon
    • Chef’s knife
    • Measuring spoons

    Method
     

    1. Start by bringing a large pot of salted water to a boil, creating a flavorful bath for your pasta.
    2. Peel the eggplant and cut it into roughly 1-inch cubes. Sprinkle with salt and set aside for 20 minutes to draw out excess moisture.
    3. While the eggplant sits, heat 1 tablespoon of olive oil in a deep skillet over medium heat. Once hot, add the eggplant cubes.
    4. Cook the eggplant, stirring occasionally, until golden brown and slightly crispy around the edges, about 10-12 minutes. Remove and set aside.
    5. In the same pot, cook your pasta until just al dente, about 1 minute less than package instructions. Drain, reserving a little pasta water.
    6. In a separate pan, heat another tablespoon of olive oil over medium heat. Add minced garlic and chili flakes, sautéing until fragrant and garlic is golden, about 1-2 minutes.
    7. Add crushed tomatoes to the garlic mixture, stirring well. Let it simmer gently for about 15 minutes, stirring occasionally until the sauce thickens slightly.
    8. Return the cooked eggplant to the sauce, stirring to coat evenly. Adjust salt and chili flakes as needed.
    9. Toss the drained pasta into the skillet with the eggplant and tomato sauce, adding a splash of reserved pasta water if needed to loosen the sauce.
    10. Remove from heat and fold in torn basil leaves for a fresh, fragrant touch. Grate ricotta salata or Pecorino Romano generously over the top.
    11. Serve immediately while hot, garnished with extra basil and cheese if desired. Enjoy the vibrant flavors and tender textures of this classic Sicilian dish.
    This dish is a testament to simple ingredients coming together in a way that’s both comforting and vibrant. It’s a reminder that Italian cooking isn’t about complexity but about respecting what’s in front of you. Feel free to tweak the salt and spice levels to match your mood or pantry. It’s a recipe that invites improvisation while staying rooted in tradition.

  • Snoop Dogg Mac and Cheese: A Bold Twist on Comfort Food

    Snoop Dogg Mac and Cheese: A Bold Twist on Comfort Food

    The Snoop Dogg Mac and Cheese is a love letter to the classic comfort food with a twist. I’ve added smoked gouda and a dash of hot sauce to bring a smoky, spicy punch that makes this dish stand out in a crowd. It’s the kind of recipe that gets made when you want something familiar but with a little swagger.

    Why this dish keeps calling me back

    It’s the combination of smoky cheese, spicy heat, and creamy comfort that’s hard to resist. Every bite reminds me of home, chaos, and moments of quiet satisfaction. It’s a dish that feels bold but familiar, making it a go-to when I need a lift or a little rebellion in my meal.

    Breaking down the bold flavors

    • Cheddar cheese: Sharp and gooey, it’s the backbone of the cheese sauce, adding richness.
    • Smoked gouda: Oozy, smoky, with a hint of caramel, it elevates the dish’s depth.
    • Hot sauce: Adds a spicy kick that wakes up the creamy base.
    • Butter and flour: Create a roux that thickens and binds the sauce perfectly.
    • Pasta: Use good quality pasta—elbow macaroni or shells work best, capturing the sauce.
    • Paprika: Sprinkled on top for a smoky, mild heat and color contrast.
    • Milk: Whole milk gives the sauce a rich, velvety texture.

    Tools of the trade for a creamy, crispy finish

    • Large pot: For boiling pasta to perfect tenderness.
    • Whisk: To smooth out roux and cheese sauce.
    • Baking dish: To bake and finish the mac and cheese in the oven.
    • Saucepan: For preparing the cheese sauce.
    • Measuring cups and spoons: To keep ingredients in check.

    Step-by-step to the perfect Snoop Dogg Mac & Cheese

    Step 1: Preheat your oven to 180°C (350°F).

    Step 2: Cook the pasta in salted boiling water until just al dente, about 8 minutes.

    Step 3: Drain and set aside.

    Step 4: In a large skillet, melt butter over medium heat. Add flour, whisking constantly for 1-2 minutes, until it smells toasty.

    Step 5: Slowly pour in milk, whisking to create a smooth roux. Cook until it thickens, about 5 minutes.

    Step 6: Stir in shredded cheese, diced smoked gouda, and a splash of hot sauce. Let it melt into a velvety cheese sauce.

    Step 7: Combine cooked pasta with the cheese sauce. Pour into a buttered baking dish.

    Step 8: Top with extra cheese and a sprinkle of paprika.

    Step 9: Bake for 20-25 minutes until bubbly and golden on top.

    Step 10: Rest for 5 minutes before serving.

    Cooking checkpoints to keep in mind

    • Cheese sauce should be smooth and silky, not grainy. If it gets lumpy, whisk in a bit more milk.
    • Pasta must be al dente—overcooked pasta turns mushy in the oven.
    • Watch the top in the oven—once golden, it’s done. Don’t let it burn.
    • Use fresh grated cheese for better melt and flavor. Pre-shredded can be dry and gritty.

    Common mistakes and how to fix them

    • Cheese sauce is grainy or too thick.? Add more milk to loosen a thick, lumpy sauce.
    • Topping gets over-browned or burnt.? Reduce oven temperature or cover with foil to prevent burning.
    • Pasta turns to mush in the oven.? Cook pasta a minute less to avoid mushiness.
    • Lumpy roux or sauce.? Stir constantly when adding milk to avoid lumps.

    Snoop Dogg Mac and Cheese

    This indulgent mac and cheese combines creamy cheese sauce with smoky gouda and a spicy hot sauce kick, baked to golden perfection. The dish features tender pasta coated in a velvety, cheesy mixture, topped with paprika for color and extra flavor. It’s a bold, comforting twist on a classic favorite with a smoky, spicy swagger.
    Prep Time 10 minutes
    Cook Time 30 minutes
    Total Time 40 minutes
    Servings: 4
    Course: Main Course
    Cuisine: American
    Calories: 520

    Ingredients
      

    • 8 oz elbow macaroni or shells, cooked al dente
    • 2 tablespoons butter unsalted
    • 2 tablespoons flour all-purpose
    • 1 1/2 cups whole milk
    • 1 1/2 cups shredded sharp cheddar cheese
    • 1 cup diced smoked gouda
    • 1 dash hot sauce adjust to taste
    • 1/2 teaspoon paprika for topping
    • additional cheese as needed extra cheese for topping

    Equipment

    • Large pot
    • Whisk
    • Baking dish
    • Saucepan
    • Measuring cups and spoons

    Method
     

    1. Preheat your oven to 180°C (350°F) and set a large pot of salted water to boil. Once boiling, add the pasta and cook until just al dente, about 8 minutes. Drain and set aside.
    2. In a large skillet, melt the butter over medium heat, filling the kitchen with a rich, toasted aroma. Add the flour and whisk constantly for 1-2 minutes until it smells toasty and the mixture turns a light golden color.
    3. Slowly pour in the milk while whisking continuously to create a smooth roux. Continue to cook and whisk until the sauce thickens and becomes velvety, about 5 minutes.
    4. Stir in the shredded cheddar, diced smoked gouda, and a splash of hot sauce. Keep whisking until all the cheese melts into a luscious, smooth sauce that smells cheesy and smoky.
    5. Combine the cooked pasta with the cheese sauce, folding gently to coat every piece evenly. Transfer the mixture into a buttered baking dish, spreading it out evenly.
    6. Top the dish with extra cheese and a sprinkle of paprika for color and smoky flavor. Place it in the oven and bake for 20-25 minutes until bubbly and golden on top.
    7. Once baked, remove from the oven and let it rest for about 5 minutes. The cheese will set slightly, making it easier to serve with a rich, crispy top and gooey inside. Dig in and enjoy the bold, smoky, spicy flavors!

    Notes

    For an extra smoky flavor, try adding a pinch of smoked paprika directly into the cheese sauce. Use freshly grated cheese for the best melt and flavor. Keep an eye on the top during baking to prevent burning.
    This dish is more than just cheesy comfort; it’s a soulful blend of smoky, spicy, and creamy textures that hit different every time. Feel free to tweak the heat or cheese blend to make it your own. It’s a messy, flavorful throwback that deserves a spot on your table, no matter the occasion.

  • Rihanna’s Favorite Caribbean Dishes: An Unexpected Journey into Island Flavors

    Rihanna’s Favorite Caribbean Dishes: An Unexpected Journey into Island Flavors

    Caribbean dishes have always fascinated me—those bold, fragrant flavors that speak of sun-soaked islands and lively markets. I remember the first time I tried a spicy jerk chicken, feeling the heat and sweetness dance on my tongue. Since then, I’ve been obsessed with capturing that complexity in my own kitchen, without the fuss of overly authentic fuss. It’s about making something vibrant, accessible, and deeply satisfying.

    Why I Keep Coming Back to This Dish

    It’s a reminder of vibrant summer nights, laughter, and the smell of spices in the air. Every time I make it, I feel a little closer to those island shores, even if I’m just in my kitchen. It’s simple, honest, and packed with flavors that stick with you long after the last bite.

    Inside the Island Pantry: Key Ingredients & Their Magic

    • Lime juice: Brightens everything with a zesty punch; skip if you want milder flavor, but it’s essential here.
    • Fresh thyme: Gives that earthy, herbal depth; dried thyme works, but fresh is brighter and more fragrant.
    • Allspice: Adds warmth and complexity, like a Caribbean cinnamon; use ground or whole berries, crushed.
    • Coconut milk: Creamy and slightly sweet, it balances spice and adds richness; swap for heavy cream if needed.
    • Bell peppers and onions: Colorful, sweet, and aromatic; skip or swap for zucchini or carrots if you prefer.
    • Garlic: Unmistakably pungent and savory, it’s the backbone of the marinade; use fresh for best aroma.

    Tools of the Trade for Island-Inspired Cooking

    • Skillet or frying pan: To sear and simmer the chicken with vegetables and sauce.
    • Marinating bowl: To evenly coat the chicken and infuse flavor.
    • Sharp knife: For mincing garlic, chopping peppers, and slicing herbs.
    • Tongs: To flip and handle hot chicken safely.
    • Measuring spoons and cups: To ensure precise seasoning and liquids.

    A Step-by-Step Journey to Caribbean Flavor

    Step 1: Start with the marinade: combine lime juice, minced garlic, chopped thyme, and a pinch of allspice. Let the chicken sit for at least 2 hours.

    Step 2: Preheat your pan over medium-high heat, about 200°C / 390°F. Add oil and sear the chicken, skin-side down. Cook until golden, about 5-7 minutes.

    Step 3: Flip the chicken, add chopped peppers, onions, and a splash of coconut milk. Cover and simmer on low for 20 minutes, until tender and fragrant.

    Step 4: Finish with a squeeze of lime and fresh cilantro. Serve hot over rice or with fried plantains for a true Caribbean vibe.

    Cooking Checks and Tips for Caribbean Perfection

    • Chicken juices run clear when pierced with a skewer, indicating it’s cooked through.
    • The sauce should be thick enough to coat the chicken, with a vibrant, glossy sheen.
    • Vegetables are tender but not mushy, offering a slight bite and fresh flavor.

    Common Pitfalls and How to Avoid Them

    • Undercooked chicken? If chicken is undercooked, return to heat and cook 5 more minutes, then check again.
    • Too acidic marinade? DUMPED too much lime juice? Add a teaspoon of honey or a splash of coconut milk to mellow.
    • Soggy vegetables? Overcooked vegetables? Remove them early and add fresh ones in the last 5 minutes.
    • Thin sauce? If sauce is too thin, increase heat and simmer until it thickens, about 10 minutes.

    Caribbean Jerk Chicken with Coconut Peppers and Onions

    This vibrant Caribbean-inspired dish features marinated chicken seared to golden perfection, then simmered with colorful peppers and onions in a creamy coconut milk sauce. The dish offers a tender, juicy texture with a fragrant, spicy-sweet flavor profile, finished with a bright squeeze of lime and fresh herbs.
    Prep Time 2 hours
    Cook Time 30 minutes
    Total Time 2 hours 30 minutes
    Servings: 4
    Course: Main Course
    Cuisine: Caribbean
    Calories: 450

    Ingredients
      

    • 2 lbs chicken thighs or breasts, skin-on preferably bone-in for more flavor
    • 1/4 cup lime juice freshly squeezed
    • 3 cloves garlic minced
    • 2 teaspoons fresh thyme leaves or 1 teaspoon dried thyme
    • 1 teaspoon allspice ground or crushed berries
    • 1 can (13.5 oz) coconut milk
    • 1 red bell pepper bell pepper chopped
    • 1 yellow onion onion sliced
    • 2 tablespoons oil for searing
    • to taste salt and pepper
    • fresh cilantro for garnish

    Equipment

    • Skillet or frying pan
    • Marinating bowl
    • Sharp knife
    • Tongs
    • Measuring spoons and cups

    Method
     

    1. Combine lime juice, minced garlic, thyme, and allspice in a bowl, then add the chicken, turning to coat evenly. Cover and marinate in the fridge for at least 2 hours to develop flavor.
    2. Preheat your skillet over medium-high heat and add oil. Once shimmering, carefully place the chicken skin-side down and sear for about 5-7 minutes until golden brown and crispy.
    3. Flip the chicken using tongs, then add the sliced peppers and onions around the chicken in the pan. Pour in the coconut milk, spreading the vegetables evenly.
    4. Reduce the heat to low, cover the skillet partially with a lid, and let everything simmer gently for about 20 minutes until the chicken is cooked through and tender, and the sauce has thickened slightly.
    5. Uncover and squeeze fresh lime juice over the dish, then sprinkle with chopped cilantro for a burst of freshness. Taste and adjust seasoning with salt and pepper as needed.
    6. Serve the jerk chicken hot, spooning the rich coconut sauce and vegetables over rice or alongside fried plantains for a true Caribbean experience.
    This dish isn’t just about the flavors—it’s about capturing a moment of island warmth. Each bite carries a story of sun, sea, and spice, inviting you to remember or imagine distant shores. Feel free to tweak the heat or add extra herbs; it’s your personal island escape in a bowl. Enjoy the process and the rich, smoky aroma that fills your kitchen.

  • Oprah Winfrey’s Turkey Chili: A Soulful Bowl with a Twist

    Oprah Winfrey’s Turkey Chili: A Soulful Bowl with a Twist

    There’s something about making a big pot of chili that feels almost ritualistic, especially when it’s a recipe Oprah swears by. It’s humble yet packed with layers of flavor, a comfort that also invites you to experiment. I’ve always been drawn to her approach—simple ingredients, honest cooking, soulful results. This version, with turkey, makes it lighter but still rich enough to satisfy.

    Why This Chili Pulls Me Back

    It’s a dish that hits the spot after a long day—filling, not fussy, and full of honest flavor. The aroma alone makes the kitchen feel like a warm hug, and each spoonful feels like a small victory. It’s versatile enough to tweak endlessly, making each batch uniquely yours.

    Breaking Down the Ingredients

    • Ground turkey: Lean, mild, and quick-cooking. Use chicken or lean beef if you prefer a different flavor profile.
    • Canned diced tomatoes: Brings acidity and sweetness, the base of the chili’s vibrant flavor. Opt for fire-roasted for extra smoky depth.
    • Black beans or kidney beans: Adds creaminess and protein, balancing the spice with their earthy flavor.
    • Chili powder, cumin, paprika: Layered spices that define the chili’s smoky, warm profile. Adjust to taste.
    • Onions and peppers: Fundamental aromatics; use red or green peppers for color and a bit of sweetness.
    • Olive oil: For sautéing; a good-quality oil brings a subtle fruitiness.
    • Fresh herbs (cilantro, scallions): Brighten each bowl with fresh, herbal notes.

    Tools of the Trade for a Perfect Chili

    • Large heavy-bottomed pot: Ensures even heat and prevents scorching.
    • Wooden spoon: For stirring without damaging the pot.
    • Measuring spoons and cups: For accurate spice and ingredient measurements.
    • Knife and chopping board: Prepping vegetables efficiently.
    • Can opener: Easily open canned tomatoes and beans.

    Step-by-Step: Crafting Oprah’s Turkey Chili

    Step 1: Gather your ingredients and equipment before you start. This keeps things smooth and stress-free.

    Step 2: Heat a large, heavy-bottomed pot over medium heat, about 180°C (355°F).

    Step 3: Add oil, then chopped onions and peppers. Cook until soft and fragrant, about 8 minutes.

    Step 4: Increase heat to medium-high, add ground turkey, breaking it apart. Cook until browned, 10 minutes.

    Step 5: Stir in spices, then add canned tomatoes and beans. Simmer uncovered for 30 minutes, stirring occasionally.

    Step 6: Taste and adjust seasoning. Let the chili rest for 10 minutes off heat to meld flavors.

    Step 7: Serve hot, garnished with fresh herbs, and enjoy a bowl that’s both hearty and lively.

    Cooking Checkpoints & Tips

    • The turkey should be cooked through and no longer pink.
    • The chili should be thick enough to hold a spoon upright, but not dry.
    • Smell for a deep, fragrant aroma of spices and roasted peppers.

    Common Mistakes & How to Fix Them

    • Overly thick or burnt at the bottom.? Add a splash of water or broth if chili is too thick and sticking.
    • Spices burning and turning bitter.? Reduce heat and stir frequently to prevent scorching.
    • Too bland or too salty.? Taste and adjust seasoning before serving to balance flavors.
    • Inconsistent texture.? Cook uncovered longer if too watery, or cover if too thick.

    Oprah’s Turkey Chili

    This hearty turkey chili combines lean ground turkey with vibrant tomatoes, beans, and aromatic spices, simmered to develop a rich and flavorful sauce. The final dish boasts a thick, comforting texture with a fragrant aroma, perfect for a cozy meal. Its layered flavors and inviting appearance make it a timeless favorite for any occasion.
    Prep Time 15 minutes
    Cook Time 40 minutes
    Total Time 55 minutes
    Servings: 6
    Course: Main Course
    Cuisine: American
    Calories: 320

    Ingredients
      

    • 1 tablespoon olive oil good quality
    • 1 large onion chopped
    • 1 red or green bell pepper chopped
    • 1 pound ground turkey lean
    • 1 can (14.5 oz) diced tomatoes fire-roasted optional
    • 1 can (15 oz) black beans rinsed and drained
    • 2 tablespoons chili powder adjust to taste
    • 1 teaspoon cumin
    • 1 teaspoon paprika
    • to taste salt and pepper
    • fresh cilantro for garnish cilantro chopped
    • scallions for garnish scallions sliced

    Equipment

    • Large heavy-bottomed pot
    • Wooden spoon
    • Measuring spoons and cups
    • Knife
    • Chopping board
    • Can opener

    Method
     

    1. Gather all your ingredients and prep the vegetables by chopping the onion and bell pepper into small, even pieces. Measure out your spices and open the cans of tomatoes and beans.
    2. Heat a large heavy-bottomed pot over medium heat until warm, then add a tablespoon of olive oil. Swirl to coat the bottom of the pot.
    3. Add the chopped onions and peppers to the hot oil, sautéing until they become soft and fragrant, about 8 minutes. You should hear gentle sizzling and see the vegetables turn translucent and slightly caramelized around the edges.
    4. Increase the heat to medium-high, then add the ground turkey to the pot. Break it apart with your spoon and cook until browned and cooked through, about 10 minutes. The turkey will turn from pink to a golden brown, releasing a savory aroma.
    5. Sprinkle in the chili powder, cumin, and paprika, stirring well to coat the meat and vegetables evenly. Let the spices toast slightly for about 1 minute, releasing their fragrant oils.
    6. Pour in the can of diced tomatoes along with their juices, stirring to combine everything. Follow with the drained black beans, stirring again to distribute evenly. The mixture will look vibrant and slightly chunky.
    7. Bring the chili to a gentle simmer, then reduce the heat to low. Cover the pot loosely and let it cook uncovered for 30 minutes, stirring every 10 minutes. The chili will thicken and develop a rich aroma, with bubbling sounds that signal it’s simmering gently.
    8. Uncover and taste the chili, then season with salt and pepper as needed. Allow it to rest off the heat for about 10 minutes; this helps the flavors meld and deepen.
    9. Serve the chili hot in bowls, garnished with freshly chopped cilantro and sliced scallions for a bright, herbal finish. The chili should be thick, hearty, and inviting, with a vibrant color and a fragrant aroma.
    This turkey chili isn’t just a meal; it’s a warm reminder of how simple ingredients can become something soulful. It’s perfect for a busy weeknight or a lazy weekend, filling your kitchen with smoky, spicy aroma. Feel free to tweak the heat or add your favorite toppings—this dish loves personalization. Sit back, scoop generous helpings, and savor each spoonful with a sense of pride.

  • Meghan Markle’s Zucchini Bolognese: A Hidden Gem of the Garden Kitchen

    Meghan Markle’s Zucchini Bolognese: A Hidden Gem of the Garden Kitchen

    In a world obsessed with meaty sauces, this zucchini bolognese offers a fresh perspective. It’s a clever way to use garden produce, turning it into something hearty and comforting without the heaviness of traditional meat. I love how it’s all about coaxing out flavor with patience and gentle heat.

    Why I Keep Returning to This Dish

    It’s simple, adaptable, and forgiving. The way zucchini melts into a tender sauce makes me feel like I’ve captured summer’s best in a bowl. Plus, it’s quick enough to make on a whim but satisfying enough to serve as a main. That balance keeps pulling me back.

    Breaking Down the Key Players

    • Zucchini: Fresh, mild, and slightly sweet, it’s the star here. No need to peel, just grate for quick cooking.
    • Crushed tomatoes: Juicy and bright, they form the base. Use good-quality canned tomatoes for depth.
    • Onion: Adds sweetness and depth. Yellow or white work fine, just chop finely.
    • Garlic: Gives a pop of pungency. Smash and mince for maximum flavor.
    • Olive oil: Fat that carries flavor and helps cook the zucchini evenly.
    • Fresh herbs: Basil or oregano brighten the dish. Use fresh if possible for that lively aroma.
    • Salt and pepper: Essential for balancing flavors. Taste as you go.

    Tools of the Trade for a Smooth Cook

    • Wide skillet or sauté pan: Provides ample surface area for even cooking and caramelization.
    • Grater: Quickly turns large zucchinis into fluffy, sauce-friendly strands.
    • Wooden spoon: Stirs gently without damaging the delicate zucchini.
    • Can opener: Eases access to crushed tomatoes.

    The Cooking Journey – From Garden to Plate

    Step 1: Start by grating 3 large zucchinis into a bowl. No need to peel, just a gentle squeeze to remove excess moisture.

    Step 2: Heat a tablespoon of olive oil in a wide skillet over medium heat, about 160°C/320°F. Add the grated zucchini and cook until it shrinks and turns slightly golden, about 8 minutes.

    Step 3: Push the zucchini to one side. In the same pan, add chopped onion and garlic. Cook until fragrant, about 3 minutes.

    Step 4: Mix the zucchini with the onion and garlic. Pour in a can of crushed tomatoes, and simmer on low for 20 minutes, stirring occasionally.

    Cooking Touchpoints and Tips to Keep in Mind

    • Zucchini should be slightly wilted and just beginning to brown for the best flavor.
    • The sauce should be thick enough to coat the pasta without pooling—adjust simmer time accordingly.
    • Smell for a sweet, roasted aroma from the zucchini and caramelized onions—it’s your cue to finish.

    Common Pitfalls and How to Dodge Them

    • Zucchini turns to liquid and loses texture.? Add more oil and cook zucchini longer if it turns mushy.
    • Sauce remains thin and drippy.? Cook the sauce uncovered for a few extra minutes if too watery.
    • Burnt garlic makes everything bitter.? Reduce heat if garlic or onions start to burn.
    • Sauce scorches or sticks.? Stir more often if sauce sticks or burns to the pan.

    Zucchini Bolognese

    This zucchini bolognese transforms garden-fresh zucchinis into a hearty, meatless sauce by gently cooking grated zucchini with crushed tomatoes, onions, and garlic until tender and flavorful. The dish boasts a thick, rustic texture with a vibrant, summery aroma, perfect for serving over pasta or grains. It’s a simple, forgiving recipe that highlights the natural sweetness and moisture of zucchini.
    Prep Time 10 minutes
    Cook Time 30 minutes
    Total Time 40 minutes
    Servings: 4
    Course: Main Course
    Cuisine: Vegetarian
    Calories: 150

    Ingredients
      

    • 3 large zucchini no need to peel
    • 1 can crushed tomatoes preferably good quality
    • 1 yellow onion finely chopped
    • 2 cloves garlic minced
    • 1 tablespoon olive oil
    • to taste salt and pepper
    • a handful fresh basil or oregano chopped

    Equipment

    • Wide skillet or sauté pan
    • Grater
    • Wooden spoon
    • Can opener

    Method
     

    1. Grate the zucchinis into a large bowl, then gently squeeze out excess moisture with your hands or a clean towel.
    2. Heat olive oil in a wide skillet over medium heat until shimmering and fragrant.
    3. Add the grated zucchini to the skillet and cook, stirring occasionally, until it shrinks and begins to turn lightly golden, about 8 minutes. This develops a sweet aroma and slightly crispy edges.
    4. Push the zucchini to one side of the pan, then add chopped onion and cook until soft and fragrant, about 3 minutes. The onion should become translucent and smell sweet.
    5. Add the minced garlic and cook for another minute until fragrant, being careful not to burn it.
    6. Mix the zucchini, onion, and garlic together, then pour in the crushed tomatoes. Stir well to combine.
    7. Bring the sauce to a gentle simmer and cook uncovered on low heat for about 20 minutes, stirring occasionally. The sauce will thicken and develop a rich aroma.
    8. Taste and season with salt and pepper as needed, then stir in chopped fresh herbs for brightness.
    9. Once the sauce has thickened to coat the back of a spoon and the zucchini is tender, remove from heat.
    10. Serve hot over your favorite pasta, grains, or enjoy as a hearty vegetable main. Garnish with additional herbs if desired.
    This zucchini bolognese is a gentle reminder that sometimes, the simplest ingredients—when treated with care—can surprise us. It’s perfect for busy weeknights or when you want something nourishing without fuss. Feel free to toss in fresh herbs or a dash of chili—make it yours. Now, go ahead, dig in and enjoy the quiet pleasure of a dish that’s humble yet full of flavor.

  • Best Chili Recipe: A Cozy, Unconventional Spin That Warms You From the Inside Out

    Best Chili Recipe: A Cozy, Unconventional Spin That Warms You From the Inside Out

    This chili recipe was born out of a late-night craving and a cluttered pantry. I wanted something hearty but with a twist—think smoky, a little tangy, and deep with spices. It’s that kind of comfort food that tastes like a warm hug after a long day, but with a bit of a kick.

    Why I Keep Coming Back to This Chili

    It’s simple, adaptable, and the smell alone lifts spirits. I love how the flavors deepen overnight, making it perfect for leftovers or next-day lunches. It’s a recipe I can tweak endlessly, always surprising me with new nuances. Plus, it’s the kind of dish that feels like a warm blanket on a cold night, no matter how often I make it.

    Breaking Down the Key Ingredients

    • Ground meat (beef or turkey): Provides richness and meaty depth, but plant-based options work well too.
    • Crushed tomatoes: Gives body and a tangy sweetness, essential for that vibrant red sauce.
    • Onions and garlic: Layered aromatics that build flavor from the first chop.
    • Smoked paprika: Adds a smoky warmth that’s not overwhelming—use chipotle for extra kick.
    • Cayenne or chili powder: For heat, but start small—you can always add more.
    • Lime juice or vinegar: Brightens everything, cuts through richness.
    • Beans (optional): Add during simmering if you want extra heartiness.

    Tools & Equipment That Make It Easy

    • Large heavy-bottomed pot: For even heat and slow simmering.
    • Wooden spoon: To stir and scrape without scratching.
    • Chopping board & sharp knife: Prepping ingredients efficiently.
    • Measuring spoons & cups: Ensuring accurate seasoning.
    • Ladle or spoon for serving: Dish out generous portions.

    Step-by-Step to a Rich, Cozy Chili

    Step 1: Heat a large heavy-bottomed pot over medium heat, about 180°C (350°F).

    Step 2: Add a splash of oil and sauté chopped onions and garlic until fragrant, about 5 minutes.

    Step 3: Stir in ground beef or turkey, breaking it apart, cook until browned and no longer pink, about 10 minutes.

    Step 4: Pour in crushed tomatoes, a splash of beef broth, and a dash of smoked paprika, simmer for 30 minutes.

    Step 5: Taste and adjust seasoning—more salt, a squeeze of lime, or a pinch of cayenne for heat.

    Step 6: Let it rest off the heat for at least 10 minutes before serving to meld flavors.

    Cooking Checkpoints & Tips

    • Onions should be golden and translucent, not burnt.
    • Meat should be browned, not grey, to lock in flavor.
    • Sauce should thicken slightly and look vibrant, not watery.
    • Taste as you go—adjust seasoning until it feels balanced.

    Common Mistakes & How to Fix Them

    • Sauce is too dry or burnt.? Add a splash of water or broth and simmer longer if too thick.
    • Burnt smell or darkened bottom.? Lower heat and stir quickly to prevent sticking.
    • Flat-tasting chili.? Add a squeeze of lime or splash of vinegar to brighten flavors.
    • Under-seasoned.? Taste and adjust salt or spice levels before serving.

    Smoky Spiced Chili

    This hearty chili combines ground meat, crushed tomatoes, aromatic onions and garlic, and smoky spices to create a rich, flavorful dish. It develops a thick, vibrant sauce with a deep, warming flavor profile, perfect for cozy nights and leftovers alike.
    Prep Time 10 minutes
    Cook Time 40 minutes
    Total Time 50 minutes
    Servings: 4
    Course: Main Course
    Cuisine: American
    Calories: 350

    Ingredients
      

    • 1 tablespoon olive oil
    • 1 large onion diced
    • 3 cloves garlic minced
    • 1 pound ground beef or turkey
    • 28 oz crushed tomatoes
    • 1 teaspoon smoked paprika
    • 0.5 teaspoon cayenne pepper or chili powder adjust to taste
    • 1 lime lime juice or splash of vinegar
    • optional cups beans rinsed and drained, if using

    Equipment

    • Large heavy-bottomed pot
    • Wooden spoon
    • Chopping board & sharp knife
    • Measuring spoons & cups
    • Ladle or serving spoon

    Method
     

    1. Heat a large heavy-bottomed pot over medium heat and add a splash of olive oil. Once shimmering, add the diced onions and cook, stirring occasionally, until they turn golden and translucent, about 5 minutes. The onions should smell sweet and start to soften.
    2. Add the minced garlic to the pot and cook for another minute, until fragrant. You’ll notice a rich aroma filling the kitchen as the garlic releases its scent.
    3. Stir in the ground meat, breaking it apart with your spoon. Cook until browned all over, about 10 minutes. The meat should lose its pink color and start to develop a deep, caramelized crust.
    4. Pour in the crushed tomatoes and stir well to combine. Add the smoked paprika and cayenne pepper, then bring the mixture to a gentle simmer. Let it bubble softly for about 30 minutes, stirring occasionally and watching the sauce thicken and deepen in color.
    5. Taste the chili and adjust the seasoning—add salt if needed, and a squeeze of lime juice or splash of vinegar to brighten the flavors. If using beans, stir them in now and let everything simmer together for another 10 minutes.
    6. Once the sauce has thickened to your liking and flavors are well melded, remove from heat. Let it sit off the stove for a few minutes to allow the flavors to settle.
    7. Serve the chili hot, garnished with your favorite toppings if desired. Enjoy it with rice, bread, or simply on its own for a comforting, spicy meal.
    This chili isn’t about perfection but about the familiar chaos of simmering spices and the smell of something good. It’s perfect for a lazy Sunday or a spontaneous gathering. Feel free to tweak ingredients, add beans, or top with cheese—whatever makes it your own. The key is the warmth it brings, not just in your bowl but in the quiet moments of cooking.

  • Eggplant Parmesan Recipe: A Rustic Twist on a Classic

    Eggplant Parmesan Recipe: A Rustic Twist on a Classic

    Eggplant Parmesan has a wild, unpredictable charm that makes me keep coming back. There’s something about the way the eggplant’s earthy bite pairs with gooey cheese and tangy tomato sauce that’s endlessly satisfying. It’s a dish that invites improvisation — more herbs, a splash of wine, a different cheese — and that’s what keeps it exciting.

    Cooking it isn’t about perfection; it’s about the imperfect beauty of frying, layering, and baking. The process is a bit chaotic, but the smells… oh, the smells of bubbling cheese and roasting eggplant fill the kitchen with a cozy, nostalgic warmth. It’s a messy, delicious way to celebrate the humble eggplant.

    Why I Keep Coming Back to This Dish

    It’s a forgiving, soulful recipe that adapts to what I have on hand. The smell of frying eggplant and bubbling cheese always brings a sense of home. Plus, it’s versatile — I can add fresh herbs or switch cheeses — making each attempt uniquely mine.

    Breaking Down the Eggplant Parmesan Essentials

    • Eggplants: I prefer long, slender ones for uniform slices. Their slightly bitter skin adds depth. Swap with zucchini for a lighter version.: The backbone of the dish, eggplants’ spongy flesh soaks up flavors and crisps up beautifully.
    • Breadcrumbs: Use panko for extra crunch, seasoned with garlic powder and herbs. Feel free to add a pinch of cayenne for heat.: Gives the coating that satisfying crunch and golden color.
    • Mozzarella: Melty, gooey, and mild, it’s the ultimate comfort cheese. Substitute with provolone for a sharper bite.: Creates that luscious, stringy top that’s hard to resist.
    • Parmesan: Sharp, salty, and nutty, it adds a punch of flavor. Pecorino Romano can stand in if needed.: A sprinkle of this cheese on top brings depth and a salty crunch.
    • Tomato sauce: Fresh or jarred, it’s the flavor base. Look for bright, tangy varieties, or make your own with ripe tomatoes.: The tangy layer that balances richness and ties everything together.

    Tools of the Trade for Eggplant Parmesan

    • Baking dish (9×13 inch): To layer and bake the assembled eggplant Parmesan.
    • Large skillet: For frying the breaded eggplant slices.
    • Cooling rack or paper towels: To drain excess oil after frying.
    • Mixing bowls: For preparing the breading station and sauces.
    • Sharp knife: For slicing eggplants evenly.
    • Tongs: To handle hot slices safely.

    Crafting Eggplant Parmesan from Scratch

    Step 1: Preheat your oven to 200°C (390°F).

    Step 2: Slice eggplants into 1/2 inch thick rounds. Salt them generously and let sit for 20 minutes to draw out excess moisture.

    Step 3: Rinse the eggplant slices and pat dry. Set up a breading station with beaten eggs, seasoned breadcrumbs, and grated Parmesan.

    Step 4: Dip each eggplant slice into the egg wash, then coat thoroughly with breadcrumbs.

    Step 5: Heat a generous layer of olive oil in a large skillet over medium heat (about 160°C/320°F).

    Step 6: Fry eggplant slices in batches until golden brown, about 3-4 minutes per side. Drain on paper towels.

    Cooking Wisdom for Eggplant Parmesan

    • Eggplant slices should be golden and crispy, not soggy or burnt.
    • Cheese should be bubbling and just starting to brown on top.
    • The eggplant should feel tender but hold its shape when pierced.
    • Oiling the pan enough to sizzle when eggplant hits it prevents sticking.

    Common Pitfalls and How to Dodge Them

    • Oil too hot, eggplant burns before crisping.? Use a thermometer to keep oil at 160°C (320°F). If too hot, eggplant burns.
    • Eggplant remains soggy after frying.? Salt eggplant slices early, then rinse and dry thoroughly. If not, they stay soggy.
    • Uneven baking and soggy layers.? Layer sauce and cheese evenly. If too thick, it becomes mushy.
    • Greasy final dish.? Don’t skip draining fried slices. Excess oil ruins texture.

    Eggplant Parmesan

    Eggplant Parmesan is a hearty dish featuring breaded and fried eggplant slices layered with tangy tomato sauce and gooey melted cheese. The process involves frying, layering, and baking, resulting in a crispy, bubbling, and golden final appearance that’s both comforting and visually appealing.
    Prep Time 40 minutes
    Cook Time 30 minutes
    Total Time 1 hour 10 minutes
    Servings: 6
    Course: Main Course
    Cuisine: Italian
    Calories: 350

    Ingredients
      

    • 2 large eggplants long, slender preferred
    • 2 cups panko breadcrumbs seasoned with garlic powder and herbs
    • 1/2 cup Parmesan cheese grated
    • 2 cups tomato sauce bright and tangy
    • 16 oz mozzarella cheese shredded
    • 3 eggs eggs beaten
    • 2 tablespoons olive oil for frying
    • to taste salt for salting eggplant

    Equipment

    • Baking dish (9×13 inch)
    • Large skillet
    • Cooling rack or paper towels
    • Mixing bowls
    • Sharp knife
    • Tongs

    Method
     

    1. Slice the eggplants into 1/2-inch thick rounds, then generously sprinkle with salt and let sit for 20 minutes to draw out moisture and bitterness.
    2. Rinse the salted eggplant slices under cold water, then pat dry thoroughly with paper towels or a clean cloth.
    3. Set up a breading station with beaten eggs in one bowl, seasoned panko breadcrumbs mixed with Parmesan cheese in another, and a plate for breaded slices.
    4. Dip each eggplant slice into the beaten eggs, ensuring it’s coated evenly, then transfer to the breadcrumb mixture and press gently to coat thoroughly.
    5. Heat the olive oil in a large skillet over medium heat until it shimmers and sizzles when a breadcrumb is added.
    6. Fry the breaded eggplant slices in batches, about 3-4 minutes per side, until golden brown and crispy. Transfer to a cooling rack or paper towels to drain excess oil.
    7. Preheat your oven to 200°C (390°F). Spread a thin layer of tomato sauce in the bottom of the baking dish.
    8. Layer the fried eggplant slices over the sauce, then spoon more sauce over each layer, followed by a generous sprinkle of shredded mozzarella and a little Parmesan.
    9. Repeat the layering process until all eggplant slices are used, finishing with a layer of sauce and a final topping of mozzarella and Parmesan.
    10. Bake uncovered in the preheated oven for about 30 minutes, until the cheese is bubbly and golden, and the edges are slightly crispy.
    11. Remove from the oven, let sit for 5 minutes, then serve hot, enjoying the crispy top, tender eggplant, and rich sauce.

    Notes

    For extra flavor, sprinkle fresh basil or herbs on top before serving. To make it lighter, bake without frying and use a baking sheet with parchment paper.
    This dish isn’t just about layering cheese and eggplant; it’s about embracing the mess, the smell of sizzling breading, and the forgiving nature of baked cheese. Feel free to add a splash of fresh basil or a drizzle of honey before serving — it’s the kind of comfort that makes you want to start again tomorrow. Serve it hot, with a side of crusty bread or a simple green salad, and enjoy the imperfect, soulful process.

  • Lady Gaga Pasta Recipes: An Unexpected Spin on Classic Comfort

    Lady Gaga Pasta Recipes: An Unexpected Spin on Classic Comfort

    Lady Gaga’s pasta recipes often get a reputation for being elaborate, but I find that her simplest ideas pack the most punch. It’s about taking a little chaos in the kitchen and turning it into something unexpectedly delightful. This dish is a perfect example, a messy, flavorful tribute to bold, unapologetic tastes.

    Why I keep coming back to this dish

    The instant burst of spicy, lemony flavors always surprises me. It’s imperfect and messy, just like real life. It feels like a little rebellion, a reminder that sometimes the best meals are the ones you throw together with your heart. Plus, it’s so fast to make, I can whip it up during chaos or calm.

    In-depth with the ingredients

    • Pasta (spaghetti or linguine): Al dente pasta provides the perfect base—slightly firm, never mushy.
    • Garlic: Fragrant and punchy, essential for that smoky aroma—use fresh, not jarred.
    • Chili flakes: Adds a spicy kick—adjust to your heat tolerance.
    • Olive oil: Rich and fruity, helps create that glossy, flavorful sauce.
    • Lemon juice: Brightens the whole dish—use fresh for the best zing.
    • Basil: Fresh and fragrant, adds a herbal, sweet contrast.
    • Pecorino cheese: Salty and sharp, balances the spice and acidity.

    Tools of the trade for this pasta

    • Large pot: Boils the pasta evenly and quickly.
    • Skillet or large frying pan: Sauté garlic and chili flakes, then toss pasta.
    • Tongs or pasta fork: Helps coat pasta in sauce without breaking it.
    • Lemon squeezer: Extracts bright juice to finish the dish.

    Step-by-step for the perfect Lady Gaga Pasta

    Step 1: Fill a large pot with water, add a generous pinch of salt, and bring to a rolling boil at 100°C / 212°F.

    Step 2: While waiting, prepare your sauce—sauté garlic and chili flakes in olive oil until fragrant, about 2 minutes, until the kitchen fills with a smoky aroma.

    Step 3: Add cooked pasta directly to the sauce, stirring vigorously to coat every strand evenly, letting it cook together for another minute.

    Step 4: Finish with a splash of lemon juice, a handful of fresh basil, and a sprinkle of Pecorino for that sharp, salty kick.

    Cooking checkpoints to keep in mind

    • Pasta should be al dente, with a slight bite—test a strand at 9 minutes.
    • Sauce should be fragrant and slightly thickened, about 3 minutes after adding pasta.
    • Lemon juice should brighten the dish without overpowering—add last for freshness.

    Common mistakes and how to fix them

    • Overcooked pasta becomes mushy.? Add more water and cook longer if pasta is underdone.
    • Sauce scorches or sticks to pan.? Reduce heat immediately if sauce starts to burn.
    • Sauce becomes gloopy or sticky.? Add a splash of pasta water if sauce thickens too much.
    • Lemon juice was added too early, losing brightness.? Stir in a bit more lemon if the dish tastes flat.

    Lady Gaga Spicy Lemon Pasta

    This bold and messy pasta dish combines al dente spaghetti with fragrant garlic, fiery chili flakes, and bright lemon juice, all tossed together in a glossy olive oil sauce. Finished with fresh basil and sharp Pecorino cheese, it offers a punchy, flavorful experience with a slightly sticky, appealing texture.
    Prep Time 5 minutes
    Cook Time 10 minutes
    Total Time 15 minutes
    Servings: 2
    Course: Main Course
    Cuisine: Italian
    Calories: 520

    Ingredients
      

    • 200 g spaghetti or linguine al dente
    • 4 cloves garlic fresh, minced
    • 1 teaspoon chili flakes adjust to taste
    • 3 tablespoons olive oil extra virgin preferred
    • 1 lemon lemon juice freshly squeezed
    • a handful fresh basil roughly chopped
    • 50 g Pecorino cheese grated

    Equipment

    • Large pot
    • Skillet or large frying pan
    • Tongs or pasta fork
    • Lemon squeezer

    Method
     

    1. Fill a large pot with water, add a generous pinch of salt, and bring it to a rolling boil.
    2. Add the pasta to the boiling water and cook until just al dente, about 9 minutes, until it has a slight bite and is firm to the bite.
    3. While the pasta cooks, heat the olive oil in a skillet over medium heat and add the minced garlic and chili flakes.
    4. Sauté for about 2 minutes until the garlic is fragrant and slightly golden, filling the kitchen with a smoky aroma.
    5. Drain the cooked pasta, reserving a small cup of the pasta water.
    6. Add the drained pasta directly into the skillet with the garlic and chili oil, tossing vigorously with tongs to coat each strand evenly.
    7. Pour in the freshly squeezed lemon juice and continue tossing to brighten the flavors, letting the mixture cook together for about a minute.
    8. Sprinkle in the chopped basil and grated Pecorino cheese, tossing again to distribute evenly and create a glossy, flavorful coating.
    9. If the sauce appears too thick or sticky, add a splash of reserved pasta water and toss again until smooth and shiny.
    10. Give everything a final toss, taste, and adjust seasoning if needed—more lemon or chili for extra punch.
    11. Serve immediately, spooning the vibrant, messy pasta onto plates, and enjoy the bold, spicy, lemony flavors that dance on your palate.
    This pasta is all about bold flavors meeting a messy, heartfelt presentation. Don’t be afraid to toss in your favorite herbs or a dash of hot sauce—make it yours. It’s a dish that tastes like a little chaos and a lot of love, perfect for when you want something soulful and quick.

  • Snoop Dogg’s Fried Bologna Sandwich: A Flavorful Tossback with a Kick of Nostalgia

    Snoop Dogg’s Fried Bologna Sandwich: A Flavorful Tossback with a Kick of Nostalgia

    The fried bologna sandwich is a throwback that never gets old. It’s a simple, no-fuss meal that packs a punch of flavor with minimal effort. I love how the crispy edges of the bologna contrast with the soft bread, creating a perfect bite every time.

    Why This Sandwich Just Might Stay in Your Rotation

    It’s quick, honest, and hits all the right notes—crispy, juicy, with a smoky punch. No matter how many fancy options exist, this classic keeps calling me back when I need comfort or a reminder of simpler days.

    Breaking Down the Simple Goodness

    • Bologna: The star—crispy edges with a juicy, smoky interior. Swap for turkey or veggie slices for a leaner vibe.
    • Bread: Toasted to a golden crunch, providing a sturdy base. Brioche or sourdough works if you want a richer bite.
    • Mustard or pickles: Add a tangy contrast that cuts through the richness; skip if you prefer a milder taste.
    • Mayonnaise: Creamy and smooth, balances the saltiness. Try spicy mayo for an extra kick.
    • Butter or oil: For frying; use butter for flavor, oil for higher smoke point.

    Tools of the Trade for the Perfect Sandwich

    • Non-stick skillet: To fry the bologna evenly without sticking.
    • Spatula: To flip the slices gently and transfer them without breaking.
    • Toaster or oven: To toast the bread to golden perfection.
    • Paper towels: To drain excess grease from the fried bologna.

    Step-by-step to a Perfect Fried Bologna Sandwich

    Step 1: Start by heating a non-stick skillet over medium heat, about 160°C (320°F).

    Step 2: Place the sliced bologna in the pan and cook until edges crisp up, about 2-3 minutes per side.

    Step 3: While the bologna fries, toast your bread until golden and slightly crunchy.

    Step 4: Once the bologna is crispy, transfer it onto the toasted bread, and add your favorite toppings like mustard or pickles.

    Step 5: Serve hot, with the pan drippings or a smear of mayo for extra richness.

    Crispy, Juicy, and Just Right: Cooking Checkpoints

    • Bologna edges are golden and crispy, not burnt or soggy.
    • Pan juices should be bubbling and slightly caramelized, not burnt.
    • Bread is toasted to a golden hue, not pale or burnt.
    • Bologna is cooked through, with a firm yet juicy texture.

    Common Pitfalls and How to Fix Them

    • Cooking on high heat.? Use medium heat to prevent burning; lower if edges darken too quickly.
    • Breaking the slices while flipping.? Flip bologna carefully to keep slices intact.
    • Over-toasting or burning the bread.? Toast bread until golden, not burnt.
    • Leaving greasy bologna on the bread.? Drain excess grease on paper towels.

    Fried Bologna Sandwich

    This classic fried bologna sandwich features crispy edges of smoky, juicy bologna slices nestled between toasted bread. The dish is simple to prepare, with frying, toasting, and assembling creating a satisfying contrast of textures—crunchy, tender, and flavorful. It’s a nostalgic comfort food with bold flavors and a hearty bite.
    Prep Time 5 minutes
    Cook Time 10 minutes
    Total Time 15 minutes
    Servings: 2
    Course: Main Course
    Cuisine: American
    Calories: 400

    Ingredients
      

    • 4 slices bologna preferably sliced
    • 4 slices bread your choice of bread, like white, sourdough, or brioche
    • 1 tbsp butter or oil for frying the bologna
    • 2 tsp mustard or pickles optional toppings
    • 1 tbsp mayonnaise or spicy mayo for extra flavor

    Equipment

    • Non-stick skillet
    • Spatula
    • Toaster or oven
    • Paper towels

    Method
     

    1. Place the bologna slices on a plate, ready to fry, and preheat your skillet over medium heat.
    2. Add butter or oil to the skillet, letting it melt and heat up until shimmering and fragrant.
    3. Carefully place the bologna slices in the hot skillet, laying them flat without overlapping, and cook for about 2-3 minutes until the edges turn crispy and golden.
    4. Flip the slices gently using a spatula and cook for another 2-3 minutes, ensuring both sides are crispy and browned.
    5. While the bologna fries, toast your bread slices until golden and slightly crunchy, either in a toaster or oven.
    6. Transfer the crispy bologna onto paper towels to drain excess grease, then set aside.
    7. Spread mayonnaise on one side of each toasted bread slice for a creamy base.
    8. Layer the crispy bologna slices on one piece of bread, adding mustard or pickles if desired for added tang.
    9. Top with the second slice of bread, mayonnaise side down, pressing gently to secure the sandwich.
    10. Cut the sandwich in half if desired and serve immediately while the bologna is crispy and hot.

    Notes

    For extra flavor, try adding a slice of cheese or a dash of hot sauce. Keep an eye on the bologna to prevent burning; adjust heat as needed.
    This sandwich isn’t just a quick bite; it’s a little piece of childhood, reimagined with a smoky, crispy edge that makes you forget about gourmet fuss. It’s honest, messy, and totally satisfying—perfect for lazy weekends or when you need that nostalgic jolt. Feel free to personalize it—add a dash of hot sauce or a slice of cheese to make it your own.